

6 great makeup tips when wearing a blue dress

6 great makeup tips when wearing a blue dress

6 great makeup tips when wearing a blue dress

If you’re planning to look like a real blue princess at your prom or wedding, you’re probably googling how to do the perfect makeup with a blue dress.


Imagine a blue dress with flawless makeup. Once you start matching the colors and imagining what your eye shadow or lipstick will look like, consider yourself makeup ready. You need advice on when to go light and when to go heavy on your makeup, taking into account your complexion, the color of your eyes and the occasion. You can use different makeup techniques to make your blue outfit stand out from the crowd. Read on to learn more about them!

6 great makeup tips when wearing a blue dress

1. Play with colors

The first thing you need to know when trying out a new makeup is the color chart and color matching. Complementary colors help make each other stand out. So if you wear blue, you can also wear its counterpart on the color wheel. The reds and oranges on the color wheel complement the blues. So you can combine colors of this series like coral, orange, peach, brown with blue. Here you can play with colors and search for colors that best suit your face and complexion. Another trick is to highlight a color in different elements of your dress. For example, if your dress isn’t entirely blue but has elements of blue all over it, you can incorporate blue into your makeup as well. The presence of other colors will make your look trendy even if you emphasize the blue theme.

2nd base

The base or makeup on your bare face depends on the type of look you are going for. Start with a good exfoliation and moisturizer to maintain a fresh, dewy look throughout the day. You can combine warm colors such as deep red or orange with cooler shades of blue to create a warm look. Cool blue tones contain more green, while warm blue tones tend towards purple. For a warm look, start with a standard concealer stick and cover any blemishes, pimples and dark circles. Now choose a primer that is one shade darker than your original shade. This gives your skin a healthy, warm glow and doesn’t wash out in photos. If you’re naturally tanned, you can skip foundation and apply a tinted body butter or moisturizer instead. Seal the base with a mineral powder.

3. Cheek

Your cheeks shouldn’t be the focus of your look, but they’re just as important. You can match the cheek and lip color to take the color play to another level. Blue is generally a cool color. For a blue dress, a warm blush would work well as it will prevent fading and an unhealthy pallor. Pink blush would make your cheeks look rosy like a baby’s. If you want a warmer look, try a plum-colored blush. To work the blush, apply three small dabs of powder blush to the center of your cheeks. Apply to skin in circular motions with a large round brush. You can also try bronzer with a blue dress. Using the bronzing powder, draw two small streaks under your cheekbones. Using the brush, blend in straight strokes up and towards the ear. It imparts a pearly shine while accentuating your facial structure and giving a classy look.

6 great makeup tips when wearing a blue dress

4th eye

Your eyes should speak volumes with every alluring blue dress in your wardrobe. Remember that feminine eyes work particularly well with a bold and gender-neutral color like blue. Metallic smoky eyes with wing tips or cat eyes are some examples of classic eye makeup for a blue dress that creates a glamor. If you’re already wearing a hard blue like navy, the metallic part in your eyes could be gold or champagne. However, if you want your eye to be the focal point, try downplaying the cheeks and roots to avoid the costume look. If you wear cool blue, try adding green or blue to your eyes for a chic glamor look. Likewise, a warm blue dress requires purple or teal. Although they belong to the same family, the colors should not be exactly the same shade.


Apply light eye color to your entire eyelid. Now take a darker shadow and use an angled stiff brush to apply it to the outer corner of the eye in a V-shape to start the cat eye shape. Blend the eyeshadow towards the crease and also apply to the inner corners. The center should be the lightest shade. To spice up your look, apply warm gold glitter (if using pink or brown eyeshadow) or silver glitter (if using blue eyeshadow) to the center of the eyelids. Smear the waterlines of the upper and lower eyelids with kajal. Using colored or black eyeliner, draw a line across your upper eyelid, ending in a wing tip. Apply two coats of mascara to your lashes.


If you intend to highlight your lip and make it the focal point, avoid dramatic eye makeup. Apply a light brown or peachy eyeshadow to your eyes and finish by densely lining your lashes with kohl.

5. Lips

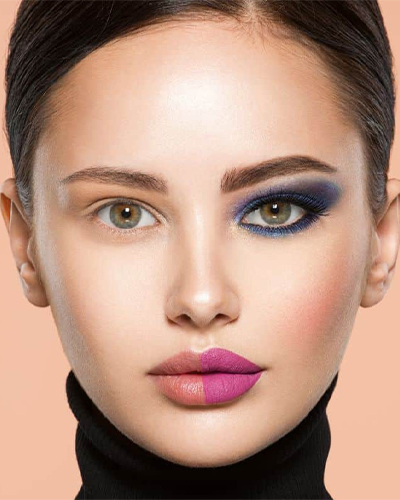
If you’ve created a dramatic look, a nude lip color is perfect for keeping the elegance. After scrubbing your lip, apply lip balm and line a nude lip liner. Cover your lips with a peach, pink, or other nude lipstick. If you want to make your lips the focal point of your look, opt for a red lip color. After lining, fill in the lip with the liner that will give the lipstick more durability. Now, cover your lips with a bold red lipstick to make a bold fashion statement. Warm pink or coral can also be combined well with blue.
6 great makeup tips when wearing a blue dress

6. Graduation

To complete your look, apply a squirt of makeup sealer. So your look stays fresh for a long time. If you have a mineral powder sealant, you can apply it to your face for a shimmering effect. Complete the look with the right nail polish and hair styling accessories.

Infographic: makeup tips to complement a blue dress

Color plays an important role in holding your look together, and even subtle tweaks to color can change the overall mood you’re going for. Dresses in blue can create an elegant or cheerful look. That’s why your makeup needs to be in sync to complete your look. We’ve summarized all of our tips in the infographic below!

To sum up, wearing a blue dress can make you feel like a real princess and the right makeup can enhance your overall look and create a stunning impression. By playing with colors that complement blue, choosing the appropriate base, cheek, eye and lip make-up and completing the look with a make-up sealant, you can achieve a beautiful and harmonious appearance.


Remember to consider your skin tone, eye color, and the specific shade of blue in your dress to adjust your makeup accordingly. Whether you’re going for an understated and elegant look or a bold and bold style, these makeup tips will help you find the perfect makeup to match your blue dress and make a lasting impression at any event makes an impression. Embrace your inner princess and rock this blue dress with confidence and beauty!


4 ways to get rid of blackheads in your ears and tips for prevention

4 ways to get rid of blackheads in your ears and tips for prevention

4 ways to get rid of blackheads in your ears and tips for prevention

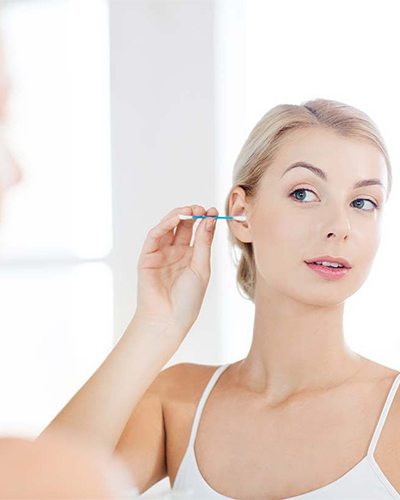
You can develop blackheads on different parts of your face and body, including your ears. And compared to other parts of the body, getting rid of blackheads in ears can be quite a task. This is because the outer ear, where the blackheads develop, is close to the delicate inner structures of the ear and also the particular contour of the outer ear. Therefore, you must proceed with caution. Read this article to learn how to properly get rid of blackheads on your ears and tips on how to prevent them.

4 ways to get rid of blackheads in your ears and tips for prevention

What are blackheads?

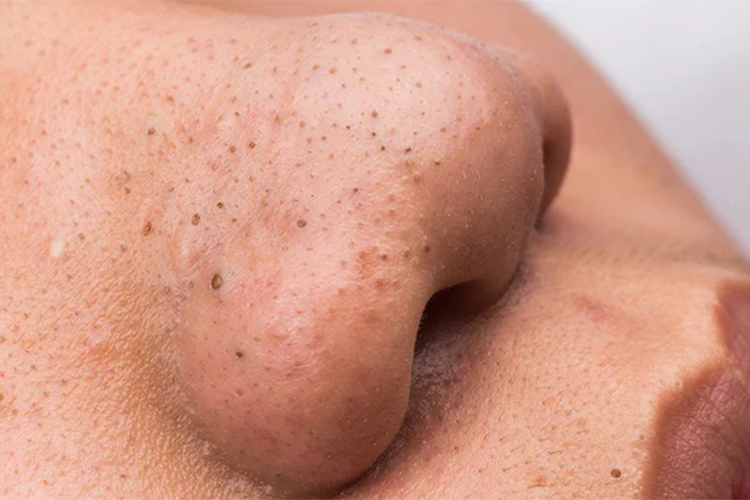
Blackheads are tiny black bumps that form on your skin when dead cells and dirt clog pores and block sebum production. These deposits in the oil glands lead to bumps on the skin (1). The clogged material oxidizes when exposed to air (since the top of the pores are open) and turns black.


Blackheads can form anywhere on the body, especially if you have oily skin. However, they are commonly seen on the chin, nose, and forehead. But your ears are no exception.


Why do blackheads form in the ear? Let’s hear it from an expert. Keep scrolling!

What Causes Blackheads in Your Ears?

dr Robin Evans, a board-certified dermatologist, says that ear blackheads are common in people with acne-prone skin. “It’s particularly common in people who have blackheads elsewhere on their face,” she says.


The skin inside your ear has hundreds of microscopic hair follicles and glands that produce oil and earwax. These substances make the skin more susceptible to blackheads. Genetic factors, different immune responses, hormonal fluctuations, and stress could also be factors that can lead to clogged pores, although more research is needed to prove this.


Most of you may know how to remove blackheads from face. But what about your ears? Scroll down to find out.

How to remove blackheads from ears?

There are some simple things you can do to get rid of blackheads in your ears.

1. Wash your ears regularly

Wash your ears daily to remove dirt, excess oil, and other debris.

You can use a cleanser that contains salicylic acid — an effective and safe solution for acne lesions (2).


Rub your ears with a cotton ball soaked in the detergent.

Wipe it off with a clean cotton ball and rinse your ears.

Tilt your head to the side to prevent the cleaner from dripping into your inner ear.

Related: Using Hydrogen Peroxide to Remove Earwax: Safe or Not?

2. Exfoliate your ears

Exfoliating will help you remove dead skin cells that are clogging your pores. Exfoliants that contain salicylic acid, glycolic acid, or alpha hydroxy acids are effective in treating acne problems (3), (4).


Take some scrub on your finger and gently rub it on the blackheads in your ear. Leave it on for 2-3 minutes.

Wipe it off with a clean cotton ball or soft cloth.

Exfoliate your ears once a week.

Note: Improper and excessive ear peeling can cause redness and itching. Be sure to adjust the concentration of these scrubs to your skin type to avoid any unwanted effects.

4 ways to get rid of blackheads in your ears and tips for prevention

3. Use acne medication

Use acne medications or topical antibiotics like retinoids and adapalene for recurring blackheads (5).


You can also use over-the-counter medications to get rid of blackheads in your ears overnight. Medications that contain ingredients like salicylic acid, glycolic acid, or alpha hydroxy acids can help unclog pores and remove blackheads. If you have any skin conditions, consult your doctor before taking over-the-counter acne medication.


Although manual extraction methods also exist, it is best to consult a professional for this.


dr Robin Evans says, “The topical medications target the keratin formation that causes blackheads.” They come in a 0.3 percent formulation (gel) as prescription drugs and in a 0.1 percent formulation (cream) as over-the-counter products available. “Although the stronger agent is more effective, one could try the over-the-counter product to begin treatment,” she adds.

4. Extract the blackheads

Consider removing the blackheads with an extraction tool if these methods don’t work. This tool will help you release the oil in the affected pores.


Manual extractions can be the best choice when you want to know how to remove blackheads from ears. The extractions are quite difficult to perform on yourself. Therefore recommends Dr. Evans to have this procedure performed by an experienced doctor. A professional knows how much pressure to apply to the skin, at what angle, and what safety precautions to take.


Even after removal, blackheads can appear. So you should know how to prevent them. Keep scrolling for a list of tips to follow.

This will prevent blackheads from forming in your ears

It’s important to keep your ears clean and free of excess oil to prevent blackheads from forming. Here are some tips you can follow:


Clean your ears daily with a cotton ball or soft cloth.

Avoid touching your ears frequently as this can trigger an outbreak.

Clean everything that comes in contact with your ears weekly, including your cell phone and pillowcases. This helps prevent dirt and bacteria from building up in your ears.

Only use non-comedogenic skin care products.

Tie back your unwashed hair to prevent the oil from getting into your ears.

Do not remove blackheads with your nails or needles as this can cause irritation and further pimples. Infection and inflammation can also occur, leading to painful and swollen pimples.

Don’t apply acne products more often than recommended. This can dry out your skin and lead to excessive oil production, leading to more blackheads.

Wondering when to consult a dermatologist? Find out in the next section.

4 ways to get rid of blackheads in your ears and tips for prevention

When should you see a dermatologist?

Visit a dermatologist if none of the above methods work for you. As previously mentioned, it is always a good idea to see a dermatologist to remove blackheads with an extractor.


In addition, the independent removal of blackheads from the ear can be painful. The ear cartilage is sensitive. A dermatologist will loosen the blackheads with a sharp scalpel blade and remove them with a cotton swab. They can also prescribe medication for blackhead removal and prevention.

Infographic: Can Headphones Cause Blackheads?

A lack of simple headphone hygiene is why your headphones can cause blackheads in your ears. Headphone hygiene means regular cleaning of your headphones. However, other headphone-related issues can also play a role. Learn how to prevent blackheads in your ears caused by your headphones in the infographic below.

In summary, blackheads can develop in the ears due to clogged pores, excess oil, and dead skin cells. While there are several ways to remove blackheads from ears, it’s important to exercise caution and follow the right techniques to avoid damaging the delicate ear skin and structures. Regular ear cleaning, exfoliation, and the use of acne medication or topical antibiotics can help clear blackheads. When these methods fail, consulting a dermatologist for professional extraction and prescribing medication is advisable.


To prevent ear blackheads, it is important to practice good ear hygiene, avoid frequent touching, and regularly clean objects that come in contact with the ears. Additionally, using non-comedogenic skin care products and not using nails or needles to remove blackheads is vital to preventing irritation and further breakouts.


Overall, proper care and attention can help treat and prevent blackheads in the ears and keep ear skin healthy and clear without causing damage or discomfort.

5 DIY agave nectar face masks for flawless skin

5 DIY agave nectar face masks for flawless skin

5 DIY agave nectar face masks for flawless skin

Agave nectar is an ancient remedy extracted from the leaves of the agave (a succulent plant) that helps treat various skin conditions. Topical application of this natural sweetener has a skin-soothing effect and may aid in wound healing. The agave nectar face mask purifies the skin and provides a refreshing feeling. This article is about the benefits of agave nectar for the health and well-being of your skin, as well as some DIY agave nectar face mask recipes you can make at home. Continue reading.

5 DIY agave nectar face masks for flawless skin

Agave Nectar: What Is It and How Is It Beneficial for Your Skin?

Agave nectar (pronounced uh-ga-vee) is derived from the agave plant (the same plant used to make tequila). This succulent’s razor-sharp, spiky looks are quite intimidating, but beneath its sturdy exterior lies the solution to all your skin problems—agave nectar.


Agave nectar looks similar to honey. It is commonly used to sweeten beverages. However, just like honey, it also has healing properties. The ancient Aztecs considered this plant a gift from the gods. They used the nectar to flavor their food and drinks. It was also part of their folk remedy.


So how exactly does it help care for your skin? Here’s how:


Its moisturizing properties keep your skin hydrated, soft and supple.

It plumps your skin and reduces the appearance of fine lines.

It soothes irritated skin.

It brightens your skin.

When mixed with other ingredients, it gently exfoliates your skin.

If you have dull and dry skin, agave nectar can bring it back to life.

If you are struggling with a combination of different skin problems, agave nectar is an absolute godsend for you. Here are a few rejuvenating DIY agave nectar face mask recipes you can try to reap the benefits of this wonder ingredient.

DIY agave nectar face masks

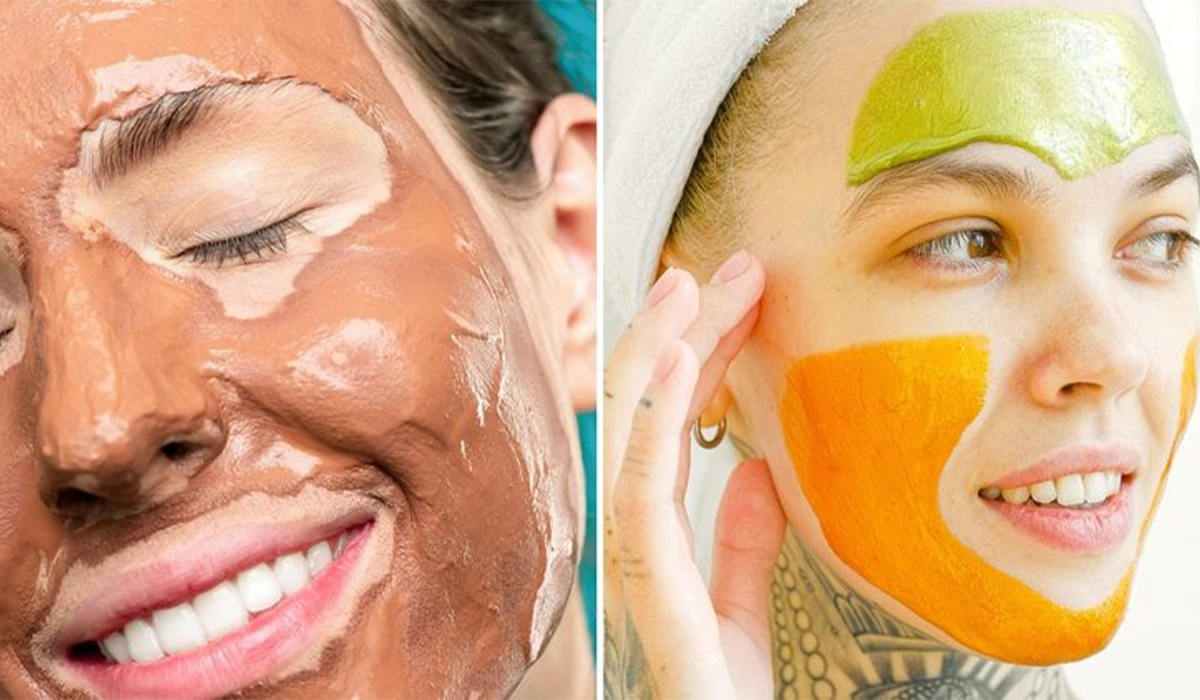
1. Agave Nectar and Turmeric Face Mask (To Brighten Your Skin)

you will need

1 tablespoon agave nectar

1 teaspoon turmeric powder

method

Mix the ingredients in a glass bowl.

Apply the mixture to the entire face with a cosmetic brush.

You can also apply it to your lips as a lip mask.

Leave it on for 20-60 minutes.

Dampen a washcloth with lukewarm water and gently wipe the mask off your face.

Wash your face with a mild face wash and pat dry.

If you have dry skin, apply a skin serum or light moisturizer.


Note: This agave nectar mask may drip and stain your clothes. Be sure to cover your clothes and clean your face thoroughly before starting any skin care routine.

5 DIY agave nectar face masks for flawless skin

2. Face mask and scrub with agave nectar and coffee (for dull and dry skin)

you will need

1 tablespoon agave nectar

1 tablespoon of coffee grounds

method

Place agave nectar and coffee in a glass bowl.

Use a spatula to mix them together.

Use your fingers to spread the mixture all over your face, except for the delicate areas around your eyes.

Leave on for 15 minutes.

Gently massage in the scrub with your fingers in circular motions. Continue doing this for another 5-10 minutes.

Wash your face first with lukewarm water, then with cold water.

Pat your face dry and apply aloe vera gel or a light serum.

3. Face mask with agave nectar and baking soda (to rejuvenate your skin)

you will need

1 teaspoon agave nectar

½ teaspoon baking powder

2 drops essential oil (lavender oil or tea tree oil)

method

Mix agave nectar and baking soda in a glass bowl.

Add the essential oil and mix.

Wash your face thoroughly before applying the mask.

Apply the mask to your skin with your fingertips.

Leave it on for at least 10 minutes or until it dries.

Once the mask is completely dry, dampen a washcloth and gently wipe the mask off your face.

Wash your face with a mild cleanser and pat dry.

Apply a light serum or moisturizer (optional).

4. Agave Nectar and Oatmeal Face Pack (to moisturize your skin)

you will need

1 tablespoon agave nectar

1 tablespoon ground oatmeal

method

Mix both ingredients in a glass bowl.

Apply the mask generously to your face with your fingers. Distribute evenly on neck and face.

Leave on for 30 minutes.

Dampen the face mask with a little water and gently scrub in circular motions before rinsing off.

Clean your face with a gentle face wash.

Note: You can prepare this face mask and store it in a glass jar for multiple face mask sessions. However, do not keep it for more than a week.

5 DIY agave nectar face masks for flawless skin

5. Agave nectar, avocado and aloe vera face mask (for smooth and glowing skin)

you will need

2 tablespoons agave nectar

¼ cup aloe vera gel

½ avocado (mashed)

1 teaspoon sweet almond or jojoba oil

method

Mix all the ingredients in a bowl until you get a smooth paste.

Apply the mask to the entire face, including the under-eye area, using a cosmetic brush.

Let your skin immerse yourself in the beneficial effects of the mask for 30 minutes.

Wash your face with cold water.

Then apply a moisturizing cream or moisturizing gel.

Infographic: 3 agave nectar face masks for beautiful skin

Agave nectar has been used since ancient times for its many skin-beneficial properties. If you’ve always wanted to incorporate this natural elixir into your beauty routine but aren’t sure how, you’ve come to the right place. Check out the infographic below for 3 DIY Agave Nectar Face Masks and say hello to clear, glowing skin!

In summary, agave nectar, extracted from the agave plant, offers numerous skin benefits. Its moisturizing and healing properties make it an excellent ingredient for DIY face masks that can treat various skin problems. From brightening and exfoliating to rejuvenating and moisturizing, agave nectar can contribute to flawless and radiant skin.


The DIY agave nectar face mask recipes presented in this article are easy to prepare at home and can be adapted to different skin types and problems. However, it is important to do a patch test before applying any new product to the face, especially for those with sensitive skin or allergies.


By incorporating agave nectar into your skincare routine, you can savor the ancient wisdom of this natural elixir and experience its transformative effects on the health and appearance of your skin. Try these DIY face masks and harness the power of agave nectar for a radiant and revitalized complexion.

Top 15 Tips To Take Care Of Dry Skin (DIY Methods)

Top 15 Tips To Take Care Of Dry Skin (DIY Methods)

Top 15 Tips To Take Care Of Dry Skin (DIY Methods)

Dried, scratchy and dull looking cracked skin needs special attention and care. Whether it’s winter or summer, whether it’s humid or dry, moisturizing alone may not be enough to maintain skin hydration. But don’t panic; We have put together some tips for dry skin here. In addition, a few simple techniques to increase your skin’s moisture-binding ability will help you achieve softer, more supple, and more radiant skin. Read on to learn about the 15 best techniques and home remedies to treat dry skin. Keep scrolling.

1. Use warm water

When showering or washing our face, we rarely pay attention to the water temperature. However, water temperature plays an important role in keeping your skin hydrated. Use lukewarm water instead of hot water for bathing and washing your face. Lukewarm water prevents your skin from drying out further.

Top 15 Tips To Take Care Of Dry Skin (DIY Methods)

2. Use a fragrance-free detergent

Scented cleaning products contain harsh chemicals that can cause skin irritation. Use a gentle, fragrance-free cleanser on your body and face. Such a product preserves the natural moisture of the skin.

3. Use coconut oil

Coconut oil is high in fatty acids (1). It helps to moisturize the skin and lock in moisture in the skin. It also softens and smoothes the skin. Apply coconut oil right after you shower or before bed.

4. Use an oatmeal moisturizer

If you have dry, itchy, and sensitive skin, switch to an oatmeal moisturizer. Oatmeal moisturizers help calm and soothe irritated and inflamed skin (2). They also help protect the skin from UV rays and reduce redness.

5. Use aloe vera gel

Aloe Vera has anti-inflammatory properties and helps moisturize the skin. Applying aloe vera gel to your face after toning will help soothe and nourish your dehydrated skin and dead skin. Massage the aloe vera gel in circular motions for 5 minutes. Wait 10 minutes before applying any moisturizer. Gloves and socks enriched with aloe vera also help improve skin integrity and reduce dryness (3), (4), (5).

6. Apply the avocado mask

Avocados are high in vitamin E, a powerful antioxidant and skin moisturizer (6), (7). Also, using an avocado face pack can improve skin health and reduce dryness. Mash half an avocado, add 1 tablespoon olive oil and 1 tablespoon milk. Mix well and apply the mask to face and neck. Wait 20 minutes before washing it off with lukewarm water. Do this two to three times a week.

Top 15 Tips To Take Care Of Dry Skin (DIY Methods)

7. Apply hyaluronic acid serum

You can also keep your skin hydrated, plump and glowing with a hyaluronic acid serum. Dry skin tends to look aged faster, especially because the sebum glands don’t produce enough oils to keep your skin wrinkle-free and plump. Hyaluronic acid is known for its ability to retain water (8). You can use it (with or without glycerin) during the day before applying moisturizer, sunscreen and makeup.


Hyaluronic acid serums can work wonders for dry skin. A recent study published in the Journal of Cosmetic Dermatology showed an increase in overall skin hydration after using hyaluronic acid formulations for both short- and long-term use. Here’s a glimpse of how the formulation effectively increased water levels in facial skin tissue.


Hyaluronic acid increases skin moisture

clean skin

post application

baseline

week 2

week 4

week 8

72

74

76

78

80

82

84

86

Effect of the formulation over 8 weeks

Percentage of skin moisture

Effectiveness of the formulation over 8 weeks: Clean skin after use

Baseline 72.053 76.505

Week 2 73,063 75,874

Week 4 78,874 84,021

Week 8 81,526 85,537

Source: Multicenter evaluation of a topical hyaluronic acid serum

8. Avoid using anti-aging products

Anti-aging products are an absolute taboo for dry skin. However, if you use any, make sure they are free of retinoids or AHAs, as these can irritate dry skin (9), (10).

9. Regular exfoliation

Dry and peeling skin can feel itchy as well as irritating. An easy way to get rid of flaky skin is to exfoliate. Use a gentle exfoliant or chemical peels like mandelic acid to remove the top layers of dead and dry skin and cracked skin. Here are some good dry skin exfoliants to try.

10. Add oils to your bath

Do you like to soak your tired body in a lukewarm water bath with bath salts? Then consider adding your favorite body oil to your bath next time. This way your skin stays moisturized and nourished. Also, you can remove dead skin and rough skin much more easily.

11. Protect your skin from the sun

Exposing dry skin to the sun can make the problem worse. The sun’s harmful UV rays accelerate skin aging and lead to the premature appearance of wrinkles and fine lines (11). To protect your skin, apply an SPF 50 sunscreen to your exposed skin before heading out. Wear a scarf, wide-brimmed hat, hat, and sunglasses to protect your face.

Top 15 Tips To Take Care Of Dry Skin (DIY Methods)

12. Apply lip balm

Dry skin isn’t just limited to the cheeks, nose or forehead. Your lips can also become dry and cracked. Take care of your lips by applying a moisturizing lip balm or lip oil. You can also apply a mixture of honey and coconut oil daily as a lip mask to treat dry lips.

13. Use oil-based makeup

Water-based makeup is not suitable for dry skin. It may contain ingredients like dimethicone that could further dry out your skin. Use makeup from foundations and eyeshadows, as well as cream or oil-based blushes and lipsticks. Dry skin can always use the extra moisture these makeup products contain. The right make-up products also prevent dry patches or dandruff. Such products give your skin a healthy glow and a dewy finish.

14. Stay hydrated

You need to stay hydrated, especially if you have dry skin. Drink 8 glasses of water a day (or more if you exercise or live in hot climates). Consume watermelons, oranges, cantaloupes, celery, cucumbers and tomatoes to provide your body with the right nutrients and antioxidants that protect and nourish your skin.

15. Take omega-3 fatty acids and vitamin E

Omega-3 fatty acids and vitamin E supplements are rich in anti-inflammatory and antioxidant properties (7), (12). These supplements can help reduce skin inflammation and oxidative stress in the body, thereby reducing skin dryness as well (13), (14). Talk to your doctor to determine dosage and frequency.

In summary, dry skin needs special care and attention to keep it hydrated and healthy. By following these top 15 tips and DIY methods, you can effectively combat dryness, relieve irritation, and achieve softer, more radiant skin. Remember to use gentle, nourishing products, avoid harsh chemicals, and protect your skin from environmental elements like the sun. Additionally, maintaining proper hydration and incorporating beneficial dietary supplements can further improve your skin’s moisture levels. With consistent care and the right approach, you can look forward to healthy, hydrated and glowing skin all year round.

Uneven Skin Tone: Treatments, Home Remedies and Treatment Tips

Uneven Skin Tone: Treatments, Home Remedies and Treatment Tips

Uneven Skin Tone: Treatments, Home Remedies and Treatment Tips

Why rely on concealers and foundations to cover up imperfections on your skin when you can even out your skin? We’ll tell you how. You can now easily make DIY face masks for uneven skin tone right at your home.


These natural remedies can remove impurities and dead skin cells from your skin and fade the signs of environmental damage to improve skin’s clarity and brightness. So, instead of learning the tricks to blending your makeup for flawless skin, learn how to naturally lighten your skin. Scroll down to see the fixes.

Uneven Skin Tone: Treatments, Home Remedies and Treatment Tips

What is uneven skin tone?

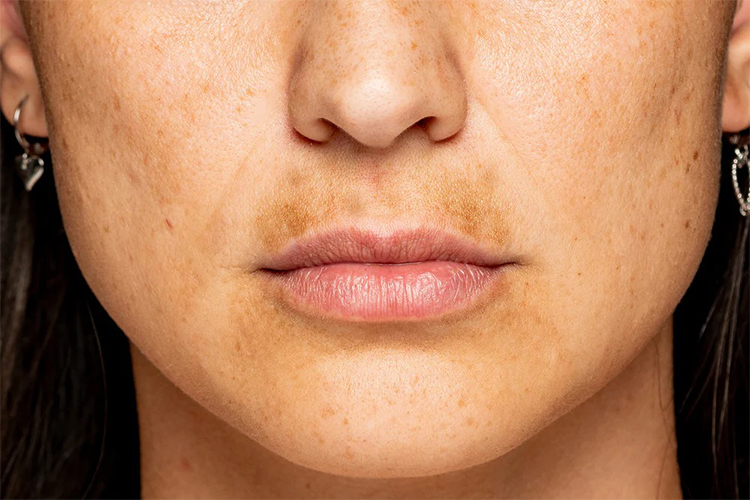
Uneven skin tone is a harmless and very common skin condition. Certain parts of your skin will become darker than the rest, giving your skin an uneven color and blotchy appearance. Due to excessive melanin production in a certain area, patches of skin become darker. There are several factors that can cause uneven skin tone.

Causes of uneven skin tone

Your skin tone becomes uneven for several reasons:


Sun Exposure: Who doesn’t love sun-kissed skin? But when love for the sun gets too intense, your skin produces excessive amounts of melanin. These pigments absorb UV rays that ultimately damage your skin cells, making the exposed areas darker than the others. This also leads to hyperpigmentation (1).

Post-inflammatory hyperpigmentation: If part of your skin has wounds, the scar may darken (2). This is called scarring. Acne on the face can also leave ugly scars.

Hormonal changes: If you are pregnant or using birth control, the imbalance in hormones can lead to increased melanin production (3). This condition is called melasma and can cause uneven skin tone. Melasma can occur when your skin reacts to certain cosmetic products or medications.

Age: With age, age-related spots appear on the face and other places.


These are some of the reasons for uneven skin tone. However, it can happen that it disappears. Gibran Shaikh, a dermatologist, says: “Patience is key. It takes about 28 days for the skin to recover, so any procedure will take at least a month or two to see results.”


The path to an even skin tone starts with the right skin care routine. Here are some natural home remedies that can help you.

Home remedies for uneven skin tone

1. Milk, gram flour and baking powder

you will need


2 teaspoons goat milk

1 teaspoon gram flour

1 teaspoon baking powder

What you have to do


Mix all ingredients in a bowl and apply to face.

   let it dry

Wash with cold water.

Goat’s milk is extraordinarily gentle and is said to come closest to the pH of our skin of all types of milk. It contains lactic acid, which is known to be a mild exfoliating agent. Chickpea flour helps exfoliate skin, reduce tanning, and lighten skin tone (4).

2. Lemon, sugar and coconut oil scrub

you will need


1 teaspoon coconut oil

1 tablespoon of granulated sugar

½ teaspoon lemon juice

What you have to do


Mix all ingredients in a bowl.

Apply the mask to your face and scrub gently. Avoid the eye area.

Wash with lukewarm water and pat dry.

report ad

Lemon juice is said to have astringent properties that help diminish dark spots and blemishes, giving you an even skin tone. Sugar helps slough off dead skin cells, and coconut oil keeps your skin hydrated.

3. Face pack with turmeric, yogurt and lemon juice

you will need


2 tablespoons plain yogurt

1 teaspoon turmeric

½ teaspoon lemon juice

What you have to do


Mix all ingredients in a clean bowl.

Apply the face mask and massage in circular motions for 2 minutes.

Let it dry and then wash it with cold water.

Both yogurt and lemon cleanse your skin and lighten your skin tone. Yogurt contains lactic acid, which also acts as a mild exfoliant (5). Turmeric has therapeutic benefits that help keep your skin healthy (6).

Uneven Skin Tone: Treatments, Home Remedies and Treatment Tips

4. Milk Powder Face Mask

you will need

2 teaspoons powdered milk

1 tablespoon of orange juice

What you have to do


Combine the ingredients and apply a thin layer of the mixture to your face.

Let it dry and then wash it with warm water.

Milk powder contains lactic acid, which has a whitening effect on your face. This face mask not only removes dead skin cells but also keeps your skin moisturized and soft. Orange juice contains vitamin C and citric acid that help shrink pores and make your skin glow.

5. Face pack with tomato, lemon juice and honey

you will need

1 tablespoon tomato juice (you can also use the pureed pulp)

2-3 drops of lemon juice

1 tablespoon of honey

What you have to do


Mix the tomato juice or pulp with lemon juice and honey.

Apply it evenly to your face.

Leave to rest for 15 minutes.

Wash it off with lukewarm water and then with cold water.

Tomatoes are high in lycopene, which helps prevent cell damage from harmful free radicals (7). Together with lemon and honey, tomatoes can prevent blemishes and ensure a healthy and even skin tone.

6. Tulsi, Neem, Multani Mitti and Rosewater face pack

you will need

1 teaspoon Multani Mitti

1 teaspoon tulsi powder (dry and powder some leaves)

1 teaspoon of neem powder

1 tablespoon rose water (adjust amount)

What you have to do


Mix all ingredients into a paste.

Spread the paste on your face and let it dry.

Rinse with cold water.

Why this works


Tulsi and neem are two medicinal plants known for their anti-inflammatory, antimicrobial, and skin-healing properties (8), (9). Multani Mitti absorbs excess oil and removes dirt to leave your skin clear and radiant.

7. Face wash with raw papaya and milk

you will need

½ cup raw papaya (diced)

2 tablespoons raw milk (adjust amount depending on consistency)

What you have to do


Blend the raw papaya into a smooth paste. Add a tablespoon of water if needed (but no more).

Add milk and make a thick paste.

Spread the paste on your face and neck.

Wait 15-20 minutes and let it dry.

Wash off with cold water.

Why this works


Green papaya is commonly used in DIY face masks. It is said to lighten the skin (10). This face mask can help remove tan and make your skin soft and healthy.

Uneven Skin Tone: Treatments, Home Remedies and Treatment Tips

8. Lemon, honey, nutmeg and cinnamon mask

you will need

½ teaspoon lemon juice

½ teaspoon cinnamon powder

½ teaspoon nutmeg

1 tablespoon of honey

What you have to do


Mix all ingredients in a bowl.

Massage it onto your face and leave it on for 20-30 minutes.

Remove the mask by massaging it with your fingers in circular motions.

Why this works


Lemon can help lighten skin, while cinnamon has anti-inflammatory properties and has been shown to be effective for mild to moderate acne (11). Honey has antibacterial properties and is a natural humectant that keeps your skin hydrated (12).

9. Honey and oatmeal

you will need

2 tablespoons of oatmeal

½ tablespoon lemon juice

2 tablespoons of honey

4 drops of tea tree essential oil

What you have to do


grind oatmeal.

Mix lemon juice, honey, rolled oats and tea tree oil in a bowl.

Apply the mixture to your face and leave it on for at least 15 minutes.

Wash the mask with cold water.

Why this works


Oatmeal contains saponins, which deeply cleanse your skin and provide a glowing complexion (13). It also has anti-inflammatory properties, making it suitable for all skin types. Honey nourishes the skin and lemon juice contains citric acid, which works against dark spots and improves impure and pigmented skin.

10. Orange Juice and Turmeric

you will need


1 tablespoon of orange juice

1 teaspoon turmeric

What you have to do


Mix well the orange juice and turmeric.

Apply it to your skin and let it dry for 10 minutes.

Wash with cold water.

Why this works


Turmeric has been used as a skin lightening agent since ancient times. It also offers skin-soothing and therapeutic benefits (6). Orange juice helps reduce blemishes and dark spots and brighten your skin.

11. Face mask with honey and lemon zest

you will need

1 tablespoon lemon peel (dry the peels in the sun and grind into a powder)

1 tablespoon of honey

What you have to do


Mix the ingredients in a bowl.

Spread the mixture evenly over your face.

Wait 15-20 minutes before washing it off.


Lemon peel has antimicrobial properties (14). This can keep your skin free from acne and other problems. It can also lighten dark spots and blemishes. This face mask is suitable for all skin types.

12. Tomato paste

you will need

1 tomato (marked)

What you have to do


Apply the tomato paste to the face and neck. let it dry

Wash with cold water.

Why this works


This is probably the easiest way to get rid of uneven skin tone. Tomato juice is commonly used to reduce tanning and lighten skin. It also helps in tightening and deep cleansing of the pores.

Aside from home remedies for uneven skin tone, you can also try medicinal treatment options.

In summary, uneven skin tone can be a common and bothersome skin condition, but it can be improved and evened out with the right approach and natural remedies. Sun exposure, hormonal changes, post-inflammatory hyperpigmentation, and age are some of the factors that contribute to this problem.


Home remedies with ingredients like milk, lemon, turmeric, honey, tomato, and oatmeal can help exfoliate skin, reduce melanin production, and promote a more even complexion. These remedies offer a gentle and natural way to combat uneven skin tone without resorting to harsh chemicals.


It’s important to remember that achieving an even skin tone takes time and consistency. So patience is the key. In addition, regular sun protection and proper skin care are essential to maintain healthy and glowing skin.

Vitamin E for Acne: Is It Effective?

Vitamin E for Acne: Is It Effective?

Lorem ipsum dolor sit amet, consectetur adipiscing elit. Ut elit tellus, luctus nec ullamcorper mattis, pulvinar dapibus leo.

Vitamin E for Acne: Is It Effective?

Vitamin E for Acne: Is It Effective?

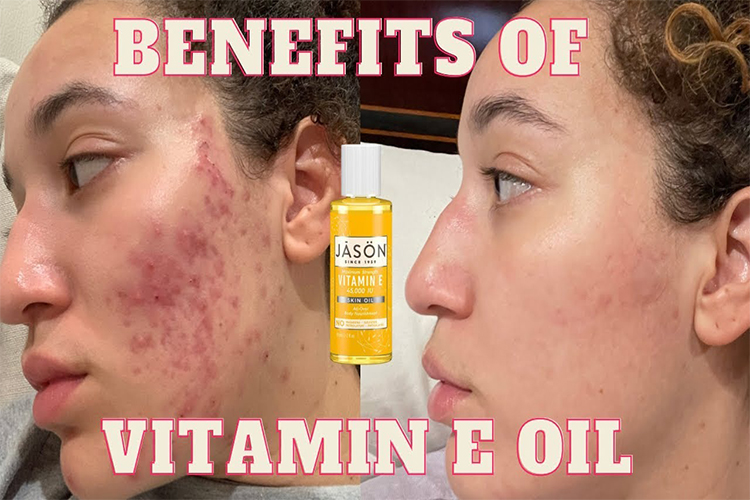
Vitamin E is a common antioxidant used in many skin care products. It’s also a popular natural remedy that’s added to many homemade skincare masks. It offers tremendous benefits for the skin. However, many people swear by the use of vitamin E oil for acne and rave about its acne-relieving properties. But does it really help against acne?

Vitamin E for Acne: Is It Effective?

Is Vitamin E Effective For Acne? What the research says

Yes. Vitamin E oil is effective against acne, but it largely depends on how you use it. However, there is little clinical evidence supporting the topical effectiveness of vitamin E oil for acne and acne scars. There are some inconclusive studies, but they need further clinical evaluation:


One study found that applying a topical treatment with vitamin E oil before benzoyl peroxide (a drug used to treat acne) could improve the drug’s effectiveness and reduce acne (1). However, more research is needed to substantiate the results.

Another study found that a combination of vitamins A and E prevented the formation of comedones (small bumps commonly found on the forehead and chin of people with acne) and thus prevented the further growth of Propionibacterium acnes, which causes acne cause (2).

Some research suggests that taking vitamin E supplements or increasing your food intake may help reduce acne.


One study found that low levels of vitamins A and E in blood plasma can make acne worse (3).

Another study conducted on hairless mice found that both topical and oral vitamin E can help reduce UV-induced skin damage, inflammation, and pigmentation ( 4Trusted Source ).

Taking a combination of lactoferrin, vitamin E, and zinc by mouth has been found to reduce acne lesions within two weeks (5). However, more research is needed to draw a better conclusion about the benefits of vitamin E in acne treatment.

Vitamin E oil can work in combination with other ingredients and not just as a single treatment. Also, it’s not clear whether taking vitamin E supplements or applying them topically will work in any given case. This largely depends on your skin type and its response to vitamin E. Therefore, before using vitamin E or taking any supplements, it is important to learn which method is effective.


However, topical vitamin E can be used for anti-aging effects. It has been observed that the reactive oxygen species (free radicals) can alter the biosynthesis or production of collagen in the skin, thus accelerating skin aging (6). Vitamin E can act as a free radical scavenger and slow down the aging process.


There are many ways you can add vitamin E to your skincare routine to reduce acne. You can achieve this through products, foods, or supplements. We recommend consulting a doctor before figuring out which method to use.


Ways to use vitamin E for acne

Vitamin E for Acne: Is It Effective?

1. Use vitamin E oil

Vitamin E is also available in cream, lotion, and serum forms. Many people squeeze the oil out of vitamin E capsules for topical use. The oil has a thick consistency, making it a good choice for people with dry and flaky skin as it acts as a moisturizer.


Apply this oil to your face while you sleep as it promotes the healing process of the skin during the night. You can apply the oil directly or mix it with your night cream. This DIY skin care can help in pimple prevention, skin rejuvenation and skin repair. You can also buy products that contain vitamin E (alpha-tocopherol) as one of the ingredients. Such products are good for general care of your skin. Combined with soothing ingredients like aloe vera and rose water, it can soothe skin redness.

2. Vitamin E Supplements

Vitamin E supplements are available in capsule or tablet form. However, there is insufficient evidence to determine the proper dosage of vitamin E for both topical and oral use (6).


Consult a dermatologist before taking vitamin E supplements. This is because if you get enough vitamin E through food, you may not need to take additional supplements. The dermatologist can do a blood test to determine if you have a vitamin E deficiency.


Note: Vitamin E supplements can interact with medications. Talk to your doctor if you’re taking medication for another health problem.

Vitamin E for Acne: Is It Effective?

3. Vitamin E through diet

Vitamin E occurs naturally in many foods. The richest sources of vitamin E are whole grains, spinach, nuts, sunflower oil, and olive oil (6). Consume foods like (7):


Nuts and seeds (peanuts, hazelnuts, almonds, sunflower seeds),

Vegetable oils (sunflower, safflower and wheat germ oil)

seafood

Green vegetables and fruits like spinach, broccoli, mango and kiwi

Consult a doctor to find out your recommended dietary dose of vitamin E. The amount of vitamin E you need depends on your age. However, people over the age of 14 (men, women, and pregnant women) need about 15 mg of vitamin E daily. If you’re breastfeeding, you may need up to 19 mg of vitamin E daily (7).


Using vitamin E (oil, capsules, or supplements) for acne just because it’s widely available can also lead to side effects.

Vitamin E for Acne: Possible Risks

Topical vitamin E is safe for the skin unless you are allergic to it. If you are allergic, it can irritate your skin and make existing symptoms worse. It can also cause contact dermatitis (8).

Some vitamin E oils contain certain types of preservatives and stabilizers (some brands mention them) that can irritate the skin. The U.S. Food and Drug Administration (FDA) does not regulate vitamin E oil. This means that the same product from two different brands can have different concentrations and react differently on your skin.

Oils, creams, and serums containing vitamin E can feel a bit heavy on oily skin. If the product’s formula is oil based, it can lead to clogged pores and worsen acne. Therefore, before purchasing vitamin E products and dietary supplements for acne, carefully check the list of ingredients and the formula. Also, do a patch test and allergy test to avoid skin irritation and reactions.

Too high serum vitamin E levels may increase the risk of bleeding or bleeding in patients taking warfarin (an anticoagulant drug) (9).

Besides vitamin E, the dermatologist may suggest other over-the-counter treatments for effective acne treatment.

In summary, while there is some evidence that vitamin E may be effective against acne, more research is needed to fully demonstrate its benefits and effectiveness as a standalone treatment. It seems to work best in combination with other acne treatments or as part of an overall skin care routine.


Topical vitamin E oil can be applied directly to the skin or included in skin care products. However, it is important to watch out for possible allergic reactions or skin irritation. Those with oily skin should also be wary of using oil-based formulas, which can clog pores and worsen acne.

How to properly apply office makeup

How to properly apply office makeup

Working women need to be more careful when choosing their office makeup routine because it needs to be long lasting, understated and impressive. In addition, they must check that the products are safe for long-term use and will not lead to an outbreak.


As the market is flooded with numerous makeup products, it becomes more and more difficult to know the right product and choose the worthy one.

Additionally, learning makeup techniques can be overwhelming whether you are a beginner or an expert.


However, slight adjustments or makeup tricks can perfect your makeup, especially on busy workdays. This article provides detailed information and some important rules to keep in mind, from cleansing your face to enhancing your lips. Keep reading the article to learn how to make your office makeup flawless!

How to properly apply office makeup

1. Start cleaning:

Before applying cosmetics in the morning, wash your face so you can start with a fresh complexion. Use a cleanser or just splash some lukewarm water on your face to wash off dead skin cells. Pat dry with a towel.

2. Apply BB Cream:

Once you’ve applied the BB cream, you’ll save yourself all the hassle of applying moisturizer, sunscreen, foundation and the hassle of makeup brushes and sponges. BB cream can also act like a foundation, providing coverage and a smoothing effect. BB cream instantly covers pimples on the face for even and radiant skin.


Apply with fingertips or a beauty blender.


TIP: It’s always handy to keep BB cream in your purse at all times. Not only does it provide light coverage, but it also moisturizes the skin.

3. Hide if necessary:

If you’re the one blessed with glowing and gorgeous skin (I have to admit, we secretly envy you!) then you can skip this step. And for the rest of us, we have a trick to get this awesome skin! A quick swipe of concealer (creamy concealer) over the pesky pimple or blemish is enough to hide it.


Apply it with your fingers. Here’s why: The heat from your fingers helps blend the concealer for a real and natural finish.

How to properly apply office makeup

4. Time to give your cheeks a rosy blush:

Now that you’re done with your foundation, apply a neutral blush to your cheekbones. It will make you look more radiant and even more awake! Quickly add a few dashes of bronzer to achieve the sun-kissed look and add dimension to your features.


If you run out of the blush you want, you can use lipstick as an alternative!

5. Softly Outline Your Eyes:

Add some definition to your look by applying a kajal or kajal to your lower lid. For the upper eyelid, use a liquid eyeliner or gel pencil and add some magic to your eyes. Don’t forget to sweep the brow pencil over your brows to lighten the effect.


You can also apply a nude eyeshadow to the eyelids. Nude eyeshadows create an even finish on the eyelids when applying the eyeliner and make the eyeliner last longer.


Finish off with a generous layer of mascara. It opens up your eyes and you can give them a fuller look with an eyelash curler. And ta-da, you’re done with your eyes!

How to properly apply office makeup

6. Beautify Your Lips:

Make your lips appear fuller by applying a lip liner and moisturizing the lips with a lip gloss instead of using a light lip color.


However, if your makeup feels incomplete without lip color, add some color to your lips. Outline the lips with lip liner and fill in the lipstick evenly with a brush.


Having a lip stain in your pocket can be a smart idea, for both lips and cheeks!


Golden rules to keep in mind when applying makeup in the office:

The very first thing to remember when doing makeup is that you need to choose the right colors and shades. You need makeup to make you stand out from the office and other places where you go out with friends and family.

Make sure it lasts, because you rarely have time for touch-ups in the workplace.

Make sure it’s waterproof and low maintenance. It would be ideal for touch-ups (just in case of meetings away from the office) in 5-10 minutes instead of 30-35 minutes.

Keep a compact powder in your purse for quick touch-ups.

Try to buy makeup from brands that are of high quality and will not cause allergic reactions.

Also, remember to properly cover your under-eye circles with a concealer to brighten your eye area instead of making you look sleepy.

Make sure it doesn’t look cakey. Just keep a simple makeup for the office and it really enhances your beauty.

Keep yourself and your skin hydrated. Hydrated skin avoids makeup cracking and excessive smudging.

Avoid exercising in extreme temperatures that could damage the skin.

Drinking water regularly will also help you keep your skin balanced and healthy.

Always carry blotters in your pocket.

Prepare your makeup the night before to avoid messing up in the morning.

Curl your lashes before applying mascara.

Run a piece of ice over your lips before applying lip gloss to keep the color all day.

If you have to work late, apply a thin layer of setting spray or setting powder to the finished makeup look.

Finally, a formal dress and simple jewelry are enough to start your day at the office.

When it comes to office makeup, make sure the products are gentle on your skin and keep your look flawless throughout the day. Avoid buying cheap and inferior products as you will use them regularly. Also, don’t forget to wear your confidence as well as makeup because it will help you stand out from the crowd.

In summary, mastering the art of office makeup is essential for working women to maintain a polished and confident demeanor in their professional environment. By following these makeup tips and tricks, such as using a BB cream for a quick and efficient base, concealing blemishes, adding a touch of bronzer and blush, defining the eyes with eyeliner and mascara, and finishing with a lip liner and lip gloss, you can achieve a flawless and long-lasting office makeup look.


Remember to choose quality products that are gentle on your skin and opt for shades that complement your natural characteristics. Avoid overdoing your makeup and strive for a simple yet elegant look that enhances your beauty without being distracting. Properly moisturizing your skin, wearing blotting paper for touch-ups, and using setting spray or powder on long workdays are other tips that will ensure your makeup stays fresh and radiant throughout the day.

Emo Makeup Tutorial and Tips

Emo Makeup Tutorial and Tips

Emo makeup is a retro beauty trend and it’s still one of the most wanted trends today. Many people, especially teenagers, love the emo makeup look. But are you wondering what emo is? It is a form of punk rock music, also popularly known as emotional hardcore or emocore.


Emo makeup requires you to master some signature makeup techniques, such as a cat emo eyeliner look with smoky eyes. This makeup look is specially designed for those who want to experiment with their makeup look and try something out of the ordinary. If you’re excited to try this out, read on for a detailed guide on how to create this look. Scroll down!

Emo makeup: base

As always, start applying makeup on fresh and clean skin. Wash your face thoroughly, pat dry and apply a good foundation as it will give your foundation a good hold. Apply concealer, preferably in stick form, to conceal any spots and blemishes. Next, apply your foundation and blend well.

Emo Makeup Tutorial and Tips

Emo makeup blush

This is a gothic faded look. Therefore, keep the blush just a little pinker than your skin tone. Don’t go for bronzer or dark peach blush. Apply to cheekbones in a circular motion, avoiding the contours or hollows of the cheeks.

Emo makeup for the eyes

Brighter

Emo Eye Makeup Tips:

The eyes are very important in this form of makeup. If you get things wrong with the eyes, your entire look will be ruined. Since you’ve already primed your eyes and blended the foundation onto them, it’s time for some shadows.


Apply a matte finish slate eyeshadow to the lids and add a small touch of black eyeshadow to the outer 1/3 corner of the lids for a smoky and intense eye look.

Next, take a liner pencil and apply it to the lash line. Extend the edges a little on both sides, the inside and outside corners, to form a 2-way wrapped wing.

Emo Makeup Tutorial and Tips

Eye makeup for emo

Using a sponge applicator, smudge the black edge of the upper lashes to achieve the gothic look. Apply a liquid liner to the lash line for a smoother look, with the pencil liner smudge effect previously created, and finish with a dark line on the lower lash line, using either your pencil liner or liquid liner.

Emo Lip Makeup:

This is a tough punk makeup look that requires the lips to be natural without a lot of heavy dark lipstick. Lightly line your lips with a light liner, preferably pink or light purple, and opt for a nude or light pink gloss. For deeper skin tones, you can use a pink or neutral pink liner and then add a light pink or pale nude gloss.


If you want to be even more expressive, you can pair your makeup with dramatic black nail polish for an edgy and unique look. This is an edgy look and goes well with hoodies in winter. I hope you found these emo makeup tips very helpful!

Emo Makeup Tutorial and Tips

Infographic: The 5 best makeup tips for the emo look

The emo look is the epitome of grunge and edgy. Whether you’re a grunge music fan or want to dress up as your favorite emo character or band member, you can easily create the look yourself! All you have to do is follow a few simple tips and you’ll be ready to create the quirky punk look that will take you back to the grunge era. In the infographic below we have listed the top five tips for the perfect emo look. Scroll down and check it out!

Conclusion

Emo makeup is a creative and bold style that allows individuals to express their unique personality and emotions through makeup. Key elements of emo makeup include dramatic eye looks with smoky eyes and cat-eye liner, subtle blush, and natural or light lips. It’s important to remember that emo makeup is all about individuality, so feel free to experiment and make it your own.


Whether you’re a fan of grunge music or just love the quirky vibe of emo makeup, the tips and techniques in this guide will help you achieve the perfect look. Unleash your creativity, have fun with your makeup and let your emotions shine with your unique emo makeup style!

How to Apply Mascara Like a Pro (Best Beginner Tutorial)

How to Apply Mascara Like a Pro (Best Beginner Tutorial)

Thick lashes add drama and intensity to your eyes. If you know how to apply mascara, you can achieve this look with ease. Makeup enthusiasts and experts alike know that a swipe or two of mascara can significantly affect the length and volume of lashes, giving you a stunning look. But beginners need help with the application process, and we’re here to help. Swipe up to find out more!

Step 1: Start with clean eyes and lashes

Make sure there are no traces of makeup on the lashes. A clean substrate is always good to prevent clumping.

Step 2: Curl your eyelashes

Looking straight ahead, hold the eyelash curler at the base of the lashes (but not too close). Now look down and gently press on the lashes. Repeat 3 times while moving towards the tip of the lashes. Depending on your needs, you can choose black or brown for the application.


Tips: Another way to curl your eyelashes is to place your index finger at the base of your eyelashes, look down and hold for 6 seconds. Do this if you are uncomfortable using an eyelash curler.

How to Apply Mascara Like a Pro

Step 3: Start in the middle

Open the mascara tube and wipe off the excess product with the applicator. Look directly in the mirror and place the applicator at the base of the lashes. Sweep the applicator up to coat your lashes from root to tip. You can “wiggle” the applicator to ensure it evenly coats the lashes.

Step 4: Go to the corners

Now comes the tricky part: coat the corners of your eyes. Use the applicator tip to cover the corners of the lashes. Coat them evenly from root to tip. This will prevent the mascara from smudging or transferring.

Step 5: Use a clean spoolie brush to prevent clumping

Using a spoolie brush or lash comb, comb your lashes down and then up to prevent clumping. Do this before the first coat of mascara has completely dried.

Step 6: Apply a second coat

Follow the same technique to apply a second coat of mascara.

The last look

Enjoy the long and full eyelashes that give the impression of false eyelashes!


This technique of applying mascara works well on the upper lashes. But what about the bottom lashes? Then you’ve come to the right place! Here is a quick guide on how to apply mascara perfectly on the lower lashes. scroll down

How to Apply Mascara on Lower

The lower lashes tend to be shorter, finer, and sparser than the upper lashes. It’s difficult to use the same mascara application technique without smudging or transferring the product. Here’s a simple guide on how to apply mascara to your lower lashes like a pro.

How to Apply Mascara Like a Pro

Step 1: Insert a tissue

Tilt your head down and look straight into the mirror. Place a tissue under your lower lashes to protect the eye area.

Step 2: Start in the middle

Wipe off the excess mascara and apply to the middle part of your lower lashes.

Step 3: Apply to corner lashes

Coating the corner lashes can be tricky. Hold the wand vertically and use the tip to cover each lash on the inner and outer corner of your eye. This technique works best for shorter or finer lashes on the lower eyelid.

How to Apply Mascara Like a Pro

The last look

Don’t your eyes look bigger and more open? In fact, your eyes will also get a “lift” illusion without any other beauty cosmetics being applied on top.


For beginners, these two tutorials are a great way to practice and quickly master the technique of applying mascara. It works for all eye shapes and lashes. But most Asian lashes are harder to curl, even with mascara. So what should you do if you have a monolid? Here’s a video with a life-changing mascara tip for beautiful Asian eyes.

In summary, applying mascara like a pro is not as difficult as it seems, especially with the right techniques and tools. Start with clean lashes, curl them to open your eyes and apply mascara carefully and evenly. These are the key steps to long, voluminous lashes. Using a clean spoolie brush to prevent clumping and applying a second coat can further enhance the look. For a flawless application on the lower lash line, using a wipe to protect the eye area, starting in the middle, and carefully applying the corner lashes will help. With a little practice and patience, even beginners can achieve stunning results and enjoy the captivating effects of a well-applied mascara. Whether you have monolid lashes or different eye shapes, there are specific techniques and tips to help you accentuate your lashes and achieve the look you want. Remember that mascara is a powerful tool that allows you to enhance your makeup and make your eyes stand out. So don’t be afraid to experiment and find the best application method for you. Have fun applying the mascara!