Dark spots on legs: causes, home remedies and treatment

Dark spots on legs: causes, home remedies and treatment

Dark spots on legs: causes, home remedies and treatment

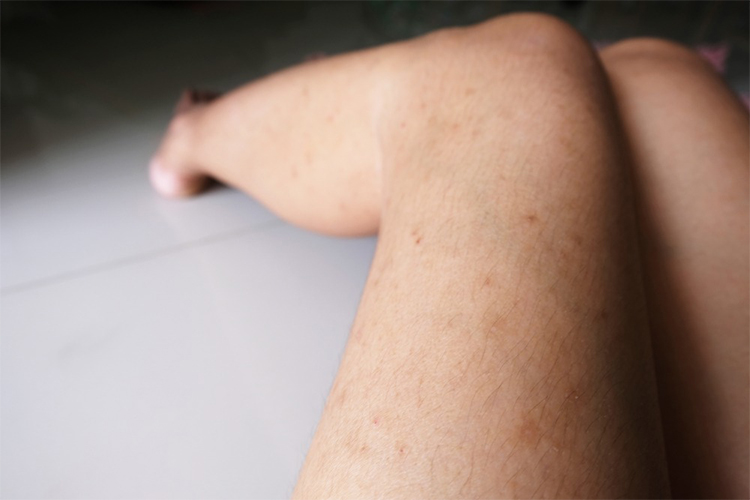
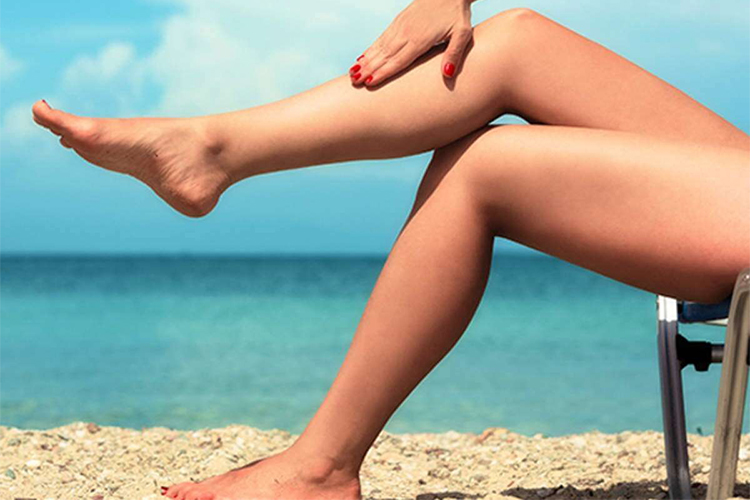
If you are worried about dark spots on legs, we have the solution for you. Dark spots or hyperpigmentation can appear on any part of the body. However, that shouldn’t stop you from flaunting your shortest shorts this summer. That’s because you can easily remove the spots with the right treatment and skin care routine.


Scroll through this article to understand why you develop dark spots on your legs, how to prevent them, and treatment options.

1. Excessive sun exposure

Dark spots typically result from excessive sun exposure and UV damage. The UV rays cause your skin to produce melanin to protect itself from them. However, some areas can experience excess melanin production, making them appear darker than the surrounding skin. Prolonged exposure to the sun can also lead to sunspots and skin cancer, especially in fair-skinned people.


A national SMS-based survey was conducted among 977 participants to examine sun protection knowledge, experience and behavior among US youth. Only 62.1% of the participants rated sun protection as very important, 25.5% as important and 5.4% as fairly important.

Dark spots on legs: causes, home remedies and treatment

2. Improper shaving

Improper shaving technique can cause tiny black spots on the legs, also known as strawberry skin. This is distinct from hyperpigmentation and occurs in a pattern very similar to skin pores and hair follicles.


This harmless skin condition is caused when you use old and dull razors and use hair removal methods like hot wax. This leads to ingrown hairs, clogged pores, rough dark spots, tiny bumps, and pigmentation.

3. Melanoma

Black and brown spots on legs can also be a dangerous skin condition called melanoma, a type of skin cancer (1). These spots generally originate on the lower legs and tend to change color and size. Melanomas on the skin are caused by excessive exposure to UV rays and the use of sunbeds for artificial tanning. If you notice any changes in the dark spots on your legs, get them checked out by a doctor as soon as possible.


According to statistics from the Centers for Disease Control and Prevention, the prevalence of melanoma increases with age. Aging is the number one risk factor for the US population. Check out the chart below for the melanoma rate in the US population by age.


arm water and pat your skin dry.

If your skin looks yellow, dip a cotton pad in some milk and rub it on your face for a few minutes.

Rinse your face again.

How often can you do this?

Three times per week.


Why this works

Milk has excellent cleansing properties that help remove dirt, dead skin cells, and other impurities from your skin (15). These turmeric face masks are effective against acne scars, pigmentation, acne, and dark spots (16). Turmeric also helps inhibit melanin production through its curcumin content. Curcumin helps block the production of ACTH, a hormone that triggers excess melanin production (17), (18).

4. Clogged pores

Just like on the face, the pores on the legs can become clogged with bacteria, dead skin and sebum. Acne-prone skin in particular tends to produce more oil and shed cells quickly. As a result, you will notice small black spots on your legs.

5. Folliculitis

Folliculitis is inflammation of the hair follicles caused by Staphylococcus aureus bacteria or other non-infectious factors such as improper shaving, waxing, and wearing tight clothing (2). This leads to red and itchy acne-like bumps on your legs that gradually turn dark.


Mild folliculitis may go away on its own. However, if left untreated, the infection can eventually lead to permanent dark spots or scarring and other skin problems.

Dark spots on legs: causes, home remedies and treatment

6. Keratosis pilaris

Keratosis pilaris, or “chicken skin,” is a skin condition characterized by tiny red or brown bumps on the skin (3). They most commonly appear on the outsides of both arms, but can also appear on the thighs and buttocks. They are caused by excess keratin production, which blocks hair follicles and leads to bumps.


Although there’s no cure for it yet, skin care practices like exfoliating and moisturizing can reduce uneven skin texture and improve the appearance of your legs.

7. Diabetic dermopathy

Diabetic dermopathy is a condition in which dark spots develop on the lower legs. These spots are also known as shin spots and are common in diabetics over the age of 50. There are no clear causes for this condition. However, it is believed that the spots are caused by excessive dryness of the skin and damaged blood vessels near the dermal layer. They tend to fade away once sugar levels are under control.


Various underlying diseases and external factors can lead to skin discoloration or pigmentation on the legs. If your dark spots are caused by an underlying condition, treatment may fade them. However, if they are due to external factors and improper skin care, you can try the following treatment options to get rid of them.

DIY home remedies

1. Baking soda

Baking soda is abrasive and can help exfoliate the skin and remove dead skin cells. This can improve the appearance of black spots on your legs.


you will need


1 tablespoon baking powder

1 tablespoon of water

method


Mix baking soda and water into a paste.

Massage the affected areas with the paste for 1-2 minutes.

Leave it on for another 2 minutes.

Rinse with water.

Apply this baking soda paste every day until you see effective results.

2. Sugar and aloe vera scrub

Sugar granules act as a natural exfoliant that can help unclog your pores and remove dead skin cells. On the other hand, aloe vera moisturizes the skin and can reduce skin inflammation (4).


you will need


2-3 tablespoons of sugar

2 tablespoons of aloe vera gel

1-2 tablespoons olive oil

method


Mix all ingredients in a bowl.

Massage the scrub onto your legs in gentle circular motions.

Rinse with cold water after 10 minutes.

Use the scrub 2-3 times a week.

3. Cucumber and rose water scrub

Cucumber extract has skin lightening properties and may lower the skin’s melanin levels (5). It also moisturizes and soothes irritated skin (6). Rose water may help maintain overall skin health (7).


you will need


1 cup grated cucumber

4 tablespoons rose water

2-3 drops of olive or coconut oil

method


Mix the ingredients into a paste.

Apply to the dark spots and massage in for 10 minutes.

Rinse off the paste with water.

Then apply a moisturizer.

Use the scrub once a day.

It may take some time for home remedies to take effect. If you want visible and faster results, you can consult a dermatologist and get treatment in the office. Some of these are listed below.

Dark spots on legs: causes, home remedies and treatment

Professional treatments

1. Laser therapy

Laser treatments are useful for correcting pigment spots on legs and reducing melasmai (8). Depending on the spots and your skin type, the dermatologist may use a specific wavelength laser. Some of the most common lasers used to treat hyperpigmentation and melasmai include:


Green light: Flashlamp-pumped pulsed dye laser (PDL) (510 nm), frequency-doubled QS Nd:YAG (Q-switched neodymium: yttrium aluminum garnet – 532 nm)

Red Light: QS Ruby (694nm), QS Alexandrite (755nm)

Near Infrared: QS Nd:YAG (1064 nm)

2. Cryotherapy:

In this treatment, the pimples are exposed to low temperatures (using liquid nitrogen solution) to destroy the dark skin cells. The spots may lighten as your skin begins to heal.


Although these treatment options can be effective, it is better to take care of your skin to avoid dark spots on your legs in the first place. Read on to learn some preventive measures for spots and stains on your legs.


How to prevent dark spots on legs

1. Shave properly

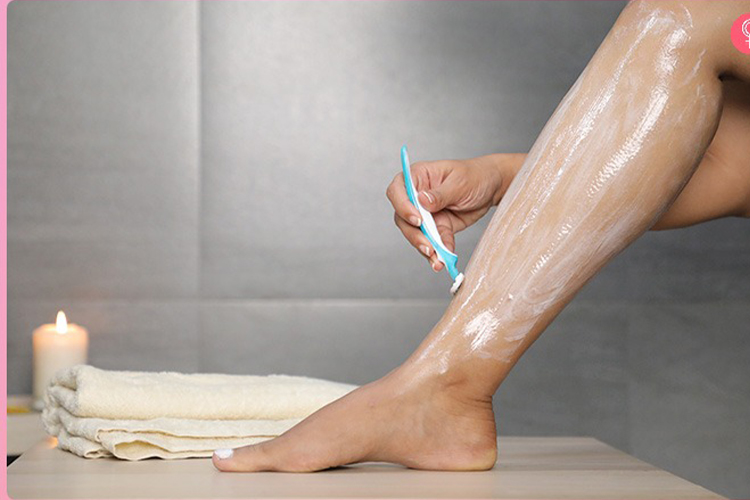
Oiling the skin and using a sharp and new razor is crucial to avoiding razor bumps and dark spots. Use shaving foam and shave against the direction of hair growth. Exfoliate before shaving and moisturize skin after shaving.

2. Exfoliation

Use scrubs and physical peels to unclog pores and prevent ingrown hairs. Regular exfoliation can also accelerate skin cell regeneration, improve skin texture and keep legs soft, smooth and clear. However, do not exfoliate too much as this could irritate your skin further and worsen hyperpigmentation on your legs.

3. Moisturize your skin regularly

Moisturizers keep your skin soft and relieve dryness and inflammation after shaving and exfoliating. Use lotions rich in vegetable oils and shea butter and always apply to damp skin to ensure optimal hydration by locking moisture into your skin for longer.

4. Wear sunscreen when going out

d sunscreen on your legs and other exposed areas. Reapply your sunscreen every 40-80 minutes for maximum protection. Use a sunscreen with at least SPF 30 and PA ++++ to prevent UVA and UVB damage.

Conclusion

Skin discoloration on legs and ankles can be caused by a variety of factors, including excessive sun exposure, improper shaving techniques, melanoma (a type of skin cancer), clogged pores, folliculitis, keratosis pilaris, and diabetic dermopathy. Preventive measures to avoid dark spots on legs include adequate sun protection, using sharp and new razors for shaving, regular exfoliation and regular moisturizing of the skin.


There are home remedies and professional treatments to treat dark spots on the legs. DIY remedies include using baking soda, sugar, aloe vera, cucumber, rose water, and other natural ingredients to exfoliate and lighten the spots. Professional treatments like laser therapy and cryotherapy can also be effective in reducing hyperpigmentation and melasma.


With home remedies, it is important to be patient as it may take some time before visible results are seen. For faster and more visible results, consulting a dermatologist for professional treatments can help. In addition, good skin care practices and preventative measures can help prevent dark spots and keep skin healthy and clear.

Can Mederma be used to treat acne scars?

Can Mederma be used to treat acne scars?

Can Mederma be used to treat acne scars?

Acne scars are stubborn and difficult to get rid of. Several products on the market claim to help you get rid of it, but none of them are proven to be effective. However, the use of Mederma for acne scars is becoming increasingly popular. But is it worth the hype? How effective is it in healing acne scars?


Mederma cream helps improve your skin and remove those acne scars. It is one of the most effective solutions currently available on the market.


People who have used Mederma swear by its effectiveness, claiming it is the best topical treatment that works without causing skin irritation.


Still not sure if you should use Mederma for your acne scars? we can help you This article explains how Mederma works on your skin, making your scars less visible and fading them. Read on to find out more.

Can Mederma be used to treat acne scars?

How does the Mederma acne scar treatment product work?

Mederma, as I mentioned earlier, is a topical gel application that consists of two main ingredients: onion and aloe vera gel.


Aloe vera is well known for skin care while onions are a lesser known remedy and remedy for skin. Aloe Vera has long been used in lotions, creams and gels for its healing properties.

Onions are an antibacterial agent that helps reduce skin inflammation and redness, providing an even complexion and smooth complexion.

Onion extract promotes collagen production and reduces inflammation.

Mederma is a gel formula that combines the healing process of these two powerful active ingredients to create an effective application for eliminating acne scars on your body.

Why do I trust Mederma for acne scars?

This product works! I can say this with certainty from personal experience. What I appreciate about the manufacturers is that they don’t fool you into thinking that your scars will go away completely.


The product label clearly states that with consistent use your scars will lighten and become almost invisible. As a consumer, I believe this gives you a good idea of what to expect from the product, which is an important consideration for me – honest, fair and realistic claims.

Can Mederma be used to treat acne scars?

Is it safe to use on the skin?

Yes, it is.


Mederma consists of natural ingredients and is therefore completely safe for use on the skin.

Unless you have a known allergy to certain chemicals, aloe vera, or onion extract, the gel does not cause any side effects or discomfort, so you can apply it before going to work, starting your daily errands, or engaging in other activities.

However, keep in mind that the gel only helps to hide the scars, not to remove them completely. If you stop using before the acne scars have completely melted into your skin, the scars may reappear.

If you find your skin is irritated or reddened, discontinue treatment and consult a dermatologist immediately.

Is Mederma limited to acne scars?

I have used the product on acne scars but know it is effective on a variety of scars. The gel works well if you had hypertrophy, accidental scars, blemishes, discoloration and blemishes on your skin.


Although the gel should not be used as a daily beauty cream, it does lighten dark spots and scars old and new. Apply the gel to the affected areas three times a day and do not skip application until the scar has lightened significantly.


I tried Mederma but my scars remained:

Ask your doctor about treating acne scars. Save

Image: Shutterstock


You must immediately consult a dermatologist. The scars you have may require heavier application. Your doctor will evaluate your skin and recommend treatment or surgery to remove the scar.


I would recommend Mederma to any other teen who dreads parties so they don’t get reprimanded for their unsightly scars. Mederma is kind to the skin, has virtually no side effects and also helps prevent new pimples from forming. I tried it and like I said, it really works. Now it is your turn!

Can Mederma be used to treat acne scars?

Infographic: Mederma for Acne Scars: How Does It Work?

Mederma is commonly used to heal new and old acne scars. While the scars may not go away completely, the ointment can help fade their appearance to a large extent. This skin care product is enriched with powerful plant extracts enriched, which improve your skin structure in a specific way. The infographic below summarizes how Mederma can help heal the scars. Just look!

In summary, Mederma is a topical gel that contains onions and aloe vera gel, known for their skin-healing properties. It is considered effective in lightening and reducing the visibility of acne scars. The gel is safe for most skin types and does not usually cause any side effects. However, to get the best results, it is important to use it regularly. While Mederma may not completely remove scars, it can significantly improve their appearance and is effective on other types of scars as well. However, if the scars do not respond to Mederma or are more severe, it is advisable to consult a dermatologist for alternative treatments or procedures. Overall, many users have had positive experiences with Mederma for acne scars and recommend it for its effectiveness and safety.

11 best ways to dry your nail polish faster

11 best ways to dry your nail polish faster

11 best ways to dry your nail polish faster

If you love painting your nails but hate waiting for the polish to dry, this article is for you. Let’s face it – there’s nothing more frustrating than going to bed with freshly painted nails and waking up to find your hard work smudged and ruined. Ditto if you’re late for dinner or a meeting but your polish just won’t dry. Do you want to know how to make nail polish dry faster? We have compiled a number of simple and effective methods to help speed up the tediously boring process.

11 best ways to dry your nail polish faster

1. Soak your nails in ice water

Dipping your fingernails in ice-cold water is perhaps the most efficient technique for drying your polish faster. It’s also insanely easy!


What you need

A bowl of cold water

ice cubes

Step-by-step instructions

Before you start painting your nails, fill a bowl with cold tap water, add a few ice cubes and set aside.

When you are finished painting your nails, wait about 2 to 3 minutes to allow the paint to set before dipping your nails into the bowl.

Leave them in for about 3 to 5 minutes.

When you take your hands out of the bowl, you will see water beading on the surface of your nails. This is a telltale sign that your paint is completely dry.

2. Run your nails under cold water

If you don’t have ice cubes handy, you can simply run your manicured nails under a gentle stream of cold tap water.


What you need

Faucet with running water

Step-by-step instructions

Turn on the faucet and run your nails under the jet of cold water.

Remember not to wash your hands. So don’t rub them together to avoid smudging your nail polish.

3. Try the cool air setting on a hair dryer

This is a faster and cleaner alternative to an ice bowl or running water. Remember: the cool environment is what we’re looking for.


What you need

A hair dryer with a cold jet function.

Step-by-step instructions

Plug in your hair dryer and set it on the coldest setting.

When you’re done painting your nails, swirl the dryer around your nails in small, circular motions for two to three minutes. Just be careful not to use too much force or hold the nail polish too close to your nails or it will blow ripples into your polish. You can also dry your nails with a gentle fan.

4. Apply a coat of oil

A drop of non-stick cooking oil is a great way to speed up nail polish drying time. You can also use baby oil, olive oil, or any carrier oil or essential oil.


What you need

Carrier oil, essential oil, baby oil or cooking oil

dropper

paper towels

Step-by-step instructions

When you are finished applying the polish, use an eyedropper to gently apply 1-2 drops of oil to your freshly painted nails.

Leave the oil on for a few minutes. The oil soaks into the paint and lets it dry faster.

If you notice the oil on your nail polish beading off, wipe it off with a dry paper towel.

11 best ways to dry your nail polish faster

5. Apply nail drying drops

Using commercial nail polish drying drops cuts your waiting time in half. Not only do these products help the polish dry faster, they also keep your nails looking super shiny. They also nourish and condition the skin around your cuticles.

6. Dilute it

As opposed to thick coats, applying multiple thin coats of nail polish gives your nails time to dry quickly between uses. It also gives you a more even finish. While it may seem like your manicure will last forever, it really isn’t. They actually reduce the overall drying time significantly.

7. Wait between shifts

Rather than starting the next shift right after the first, increase the wait time between shifts. Drying takes little longer than drying a thick layer of nail polish. Thin layers dry faster. So apply 2-3 thin coats until you reach the desired color intensity, but wait for the previous coat to dry completely. This will also ensure your final finish is smooth and flawless.

8. Switch to quick-drying formulas

Investing in a nail polish that’s specifically designed to reduce the drying time of your nail polish may be the easiest way to dry your nails faster. Some of the quick-drying formulas also claim to give your nails a glossy shine, preventing chipping and keeping your manicure looking fresher for longer. Best of all, you can find some insanely great drugstore top coat formulas at very reasonable prices.

9. Opt for a nail drying spray

Commercially available nail drying sprays are specially developed for this purpose and protect your nails. You can ask your local beauticians for product recommendations. Alternatively, you can use hairspray if you don’t want to invest in a dedicated drying spray.
11 best ways to dry your nail polish faster

10. Invest in an LED lamp

If you have a busy lifestyle but like to keep your nails in tip-top shape, an LED nail lamp is a worthwhile investment. Compared to UV lamps, which can damage your skin in the long run due to their radiation, LED lamps are safer and can dry your fresh nail polish in no time.

11. Use an air atomizer

This method is not safe in the long run, so we recommend you use it sparingly. Many people swear by using an air atomizer to instantly dry manicures and pedicures. Hold the can 20-30cm away from your nails when spraying to avoid ruining your manicure. Also make sure you wear a mask to avoid inhaling too much spray as it can be harmful to your health.


Now that you know how to quickly dry your manicure, let’s talk about proper care so that it lasts a long time.

In summary, waiting for nail polish to dry no longer has to be a hassle. With these 11 simple and effective methods, you can significantly reduce the drying time and enjoy beautiful, smudge-free nails in no time at all. Whether it’s ice water, cool air from a hair dryer, or applying oil, each technique offers a quick and convenient way to speed up the process.


Additionally, investing in quick-drying formulas, nail drying drops, or even an LED lamp can be worthwhile for those who paint their nails frequently. However, it is important to take proper care of your nails to ensure the longevity of your manicure.


So say goodbye to the frustration of waiting for nail polish to dry and use these time-saving tips for flawless and stunning nails whenever you need them. With these tricks up your sleeve, you can achieve the perfect manicure without the hassle of waiting for your nail polish to dry. Have fun painting!

10 ways to naturally lighten skin at home

10 ways to naturally lighten skin at home

10 ways to naturally lighten skin at home

Everyone has skin care issues and most of us desire glowing and glowing skin. Most of us would also have searched online for instant skin lightening tips and skin lightening supplements. But how many of them worked? Your skin will become dull and lifeless due to various factors including dust, sun exposure, pollution and other skin problems, resulting in skin darkening. What if we told you the solution is available in your pantry? You wonder how? This article introduces you to herbal skin lightening remedies made from ingredients found in your kitchen. Read on to find out more!

1. Banana face pack for skin whitening

you will need

1 ripe banana

1 teaspoon lemon juice

1 teaspoon of honey

Hand towel

preparation time

2 minutes


treatment time

15 minutes


Treatment

Mix all ingredients until you get a smooth mass.

Wash your face with a mild cleanser and pat dry with a towel.

Apply the banana mixture to your skin and leave it on for about 15 minutes.

Rinse your face with lukewarm water and pat dry.


How often can you do this?

Twice a week.


Why this works

It is one of the best skin lightening home remedies that you can try. Bananas are high in vitamins A, B, and E. They’re also a plentiful source of the mineral potassium (1). These nutrients help even out rough skin while reducing the appearance of dark spots and blemishes. They also improve skin elasticity and prevent skin aging (2). The vitamin E prevents oxidative damage while strengthening your skin’s defenses against the sun’s harmful rays (3).

10 ways to naturally lighten skin at home

2. Baking soda for skin whitening

you will need

1 tablespoon baking powder

1 ½ teaspoons water

Hand towel

preparation time

2 minutes


treatment time

5 minutes


Treatment

Mix baking soda and water until you get a smooth paste.

Wash your face with a mild cleanser and pat dry with a towel.

Gently massage the paste onto your face in circular motions. Leave it on for about 5 minutes.

Rinse your face with lukewarm water and pat dry.

How often can you do this?

2-3 times a week.


Why this works

Baking soda is a gentle exfoliant that also helps neutralize your skin’s pH (4). It has anti-inflammatory, antibacterial, and antifungal properties that can help clear acne from your skin (5), (6). It can also help unclog your pores while stripping away the damaged and dark skin from the top layers, revealing fair and healthy skin. However, people with dry and sensitive skin or open wounds should not attempt this.

3. Gram flour for skin whitening

you will need

2 tablespoons grams of flour

4 tablespoons rose water

Hand towel

preparation time

2 minutes


treatment time

20 minutes


Treatment

Combine the ingredients until you get a smooth mixture.

Wash your face with a mild cleanser and pat dry with a towel.

Apply the mixture to your skin like a face mask. Be sure to avoid the sensitive areas around the eyes and mouth.

Leave it on for about 20 minutes.

Rinse with lukewarm water and pat skin dry.


How often can you do this?

2-3 times a week.


Why this works

The chickpea flour helps control oil production in your skin while maintaining pH levels. It helps remove dirt and toxins to keep your skin looking radiant. It’s also a gentle exfoliant that helps remove dead skin cells while promoting the healthy production of new skin cells (7).

4. Lemon for skin lightening

you will need

2 tablespoons lemon juice

1 tablespoon of honey

Hand towel

preparation time

2 minutes


treatment time

15 minutes


Treatment

Combine the ingredients until you get a smooth mixture.

Wash your face with a mild cleanser and pat dry with a towel.

Apply the mixture to your skin like a face mask. Be sure to avoid the sensitive areas around the eyes and mouth.

Leave it on for about 15 minutes.

Rinse with lukewarm water and pat skin dry.

How often can you do this?

Twice a week.


Why this works

It is one of the best skin lightening tips that only takes 15 minutes to try. Lemon’s rich vitamin C content helps lighten pigmentation and dark spots and even out your skin tone (8). It’s also high in antioxidants, which help prevent oxidative damage (9). This lemon honey mask cleans and refines your pores while killing harmful bacteria that can cause breakouts. The combined bleaching properties of lemon and honey help control melanin production and lighten your skin tone.


dr Anna Chacon, MD, FAAD, a dual board dermatologist, says, “You will notice a change in the texture and tone of your skin within a month or two. Lemon juice can also be added to the mixture in small amounts. This bleach works faster.”

10 ways to naturally lighten skin at home

5. Multani Mitti for skin whitening

you will need

5-6 peeled cucumber slices

2 teaspoons Multani Mitti

1 tablespoon rose water

Hand towel

preparation time

5 minutes


treatment time

15 minutes


Treatment

Blend the ingredients until you get a smooth mixture.

Wash your face with a mild cleanser and pat dry with a towel.

Apply the mixture to your skin like a face mask. Be sure to avoid the sensitive areas around the eyes and mouth.

Leave it on for about 15 minutes.

Rinse with lukewarm water and pat skin dry.

How often can you do this?

2-3 times a week.


Why this works

The cucumber juice combined with the multani mitti in this face mask helps lighten your skin and may even fade skin discolorations (10), (7). The rose water immediately gives your skin a pink glow. Multani Mitti is also rich in minerals that nourish your skin. It has powerful bleaching, cleansing, and oil-absorbing properties that brighten your skin while keeping it clean and healthy (11).

6. Papaya face pack for skin whitening

you will need

1 papaya slice

1 teaspoon lemon juice

1 teaspoon of milk

preparation time

2 minutes


treatment time

20 minutes


Treatment

Blend the ingredients until you get a smooth mixture.

Wash your face with a mild cleanser and pat dry with a towel.

Apply the mixture to your skin like a face mask. Be sure to avoid the sensitive areas around the eyes and mouth.

Leave it on for about 20 minutes.

Rinse with lukewarm water and pat skin dry.

How often can you do this?

1-2 times a week.


Why this works

Lemon juice is one of the most popular treatments for glowing skin. Good results can be achieved in combination with papaya. This is because both lemon and papaya enzyme masks have bleaching properties that can help lighten your skin tone and give it a radiant glow (12), (8). If you have dry skin, you can add some milk to this mixture for better hydration.

7. Tomato for skin lightening

you will need

1 ripe tomato

Hand towel

preparation time

2 minutes


treatment time

20 minutes


Treatment

Puree the tomato until you get a puree consistency.

Wash your face with a mild cleanser and pat dry with a towel.

Apply the tomato puree to your skin like a face mask. Be sure to avoid the sensitive areas around the eyes and mouth.

Leave it on for about 20 minutes.

Rinse with lukewarm water and pat skin dry.

How often can you do this?

Daily


Why this works

Tomatoes are a rich source of vitamins A, B, and C. They also contain calcium, magnesium, and potassium (13). While the minerals help to heal and moisturize your skin, the vitamins prevent premature aging and promote healthy cell production. Tomatoes help give you glowing skin, and their lycopene content protects your skin from the sun’s harsh UV rays (14).

10 ways to naturally lighten skin at home

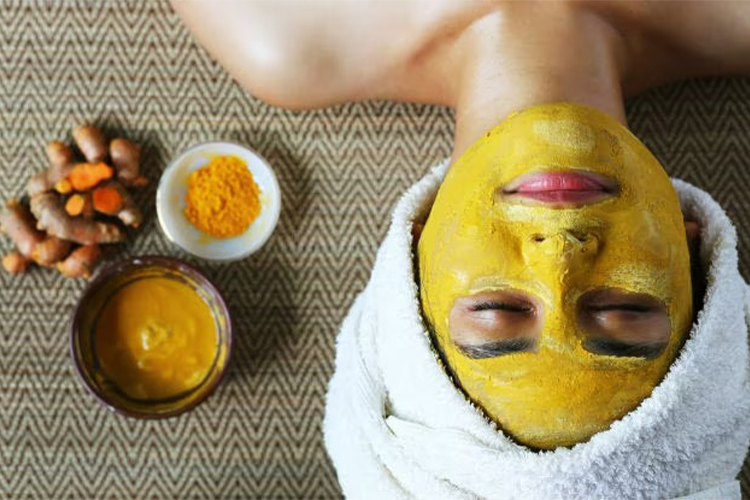
8. Turmeric for skin lightening

you will need

½ teaspoon turmeric

1 teaspoon of milk

Hand towel

preparation time

2 minutes


treatment time

1 hour


Treatment

Combine the ingredients until you get a smooth mixture.

Wash your face with a mild cleanser and pat dry with a towel.

Apply the mixture to your skin like a face mask. Be sure to avoid the sensitive areas around the eyes and mouth.

Leave it on for about 1 hour.

Rinse with lukewarm water and pat skin dry.

If your skin looks yellow, dip a cotton pad in some milk and rub it on your face for a few minutes.

Rinse your face again.

How often can you do this?

Three times per week.


Why this works

Milk has excellent cleansing properties that help remove dirt, dead skin cells, and other impurities from your skin (15). These turmeric face masks are effective against acne scars, pigmentation, acne, and dark spots (16). Turmeric also helps inhibit melanin production through its curcumin content. Curcumin helps block the production of ACTH, a hormone that triggers excess melanin production (17), (18).

9. Ubtan for skin whitening

you will need

1 tablespoon gram flour

1 tablespoon rice flour

2 teaspoons lemon juice

2 teaspoons milk

preparation time

2 minutes


treatment time

25 minutes


Treatment

Combine the ingredients until you get a smooth mixture.

Wash your face with a mild cleanser and pat dry with a towel.

Apply the mixture to your skin like a face mask. Be sure to avoid the sensitive areas around the eyes and mouth.

Leave it on for about 20 minutes.

After 20 minutes, wet your hands and gently rub the dry mask onto your face as you would a scrub.

Rinse with lukewarm water and pat dry.

How often can you do this?

1-2 times a week.


Why this works

Homemade ubtan face packs are usually used by Indian brides to add glow to the skin while improving their health (19). The use of multiple ingredients in one ubtan makes it an effective face pack for promoting skin health. This pack packs the goodness of chickpea flour, milk, lemon juice, and rice flour.

10. Aloe Vera for skin lightening

you will need

1 aloe vera leaf

Hand towel

preparation time

2 minutes


treatment time

10 mins


Treatment

Cut an aloe leaf in half and scoop out the gel.

Blend the gel to get a smooth consistency.

Wash your face with a mild cleanser and pat dry with a towel.

Apply the gel to your skin like a face mask. Be sure to avoid the sensitive areas around the eyes and mouth.

Leave it on for about 10 minutes.

Rinse with lukewarm water and pat skin dry.

How often can you do this?

Twice a day


Why this works

This remedy can help you get glowing skin instantly in 10 minutes. Aloe vera gel contains around 150 nutrients, including enzymes, lignins, salicylic acids, sterols, saponins, amino acids, minerals, and anthraquinones (20). About 96% of the gel is water, making it extremely moisturizing for the skin (21). It contains minerals such as magnesium, zinc and selenium that repair and protect the skin from damaging factors such as chemicals, harsh sunlight and pollution. The vitamins and minerals in this ingredient also help inhibit melanin production and lighten your skin (22).

There are also other skin lightening tips that you can follow. dr Chacon says, “All you have to do is add a pinch of turmeric ellen and even out your skin tone (8). It’s also high in antioxidants, which help prevent oxidative damage (9). This lemon honey mask cleans and refines your pores while killing harmful bacteria that can cause breakouts. The combined bleaching properties of lemon and honey help control melanin production and lighten your skin tone.


dr Anna Chacon, MD, FAAD, a dual board dermatologist, says, “You will notice a change in the texture and tone of your skin within a month or two. Lemon juice can also be added to the mixture in small amounts. This bleach works faster.”

8 useful makeup tips to make your forehead appear smaller

8 useful makeup tips to make your forehead appear smaller

8 useful makeup tips to make your forehead appear smaller

If you were wondering how to make your forehead appear smaller, you’ve landed on the right page. Makeup and beauty products can define your natural features and enhance your appearance. They can even help you create and experiment with new looks by playing with your facial features. For example, if you know the right makeup tricks, you can make your thin lips appear fuller, give your eyebrows the density you want, and sharpen your jawline. A unique and interesting feature is a large forehead, which is often considered a blemish. This article will discuss some simple yet effective makeup tricks that you can use to make your forehead look smaller without having to undergo surgery. Swipe up to view them.


How to Make Your Forehead Look Smaller – Top 8 Makeup Tips:

If you want to conceal a big forehead for a while, here are the tricks that can help you look beautiful.


Note: Consider the following tips before trying these makeup tricks:


Start with clear, fresh skin by following a good skincare routine that includes sunscreen application.

Follow a healthy diet and stay hydrated to maintain supple skin.

Take it a step further and try popular facial hair removal methods to ensure makeup applies smoothly and lasts longer.

Wear hairstyles like bangs or fringes to make the makeup stand out.

8 useful makeup tips to make your forehead appear smaller

1. A touch of blush:

A bright blush is a great way to draw attention away from your forehead.


Swipe some rosy or peachy blush across your cheeks.

Apply the product upwards for a light lifting effect.

Using shimmery, illuminating cheek products is also a powerful trick. It lets the light reflect off your cheeks, drawing attention to the center of your face.

2. Darker Foundation:

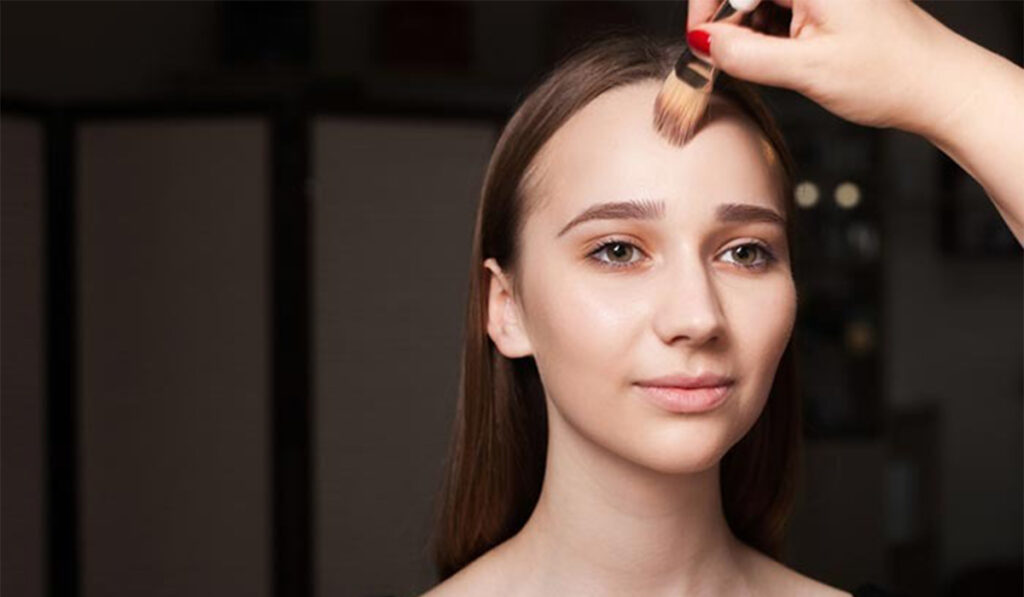
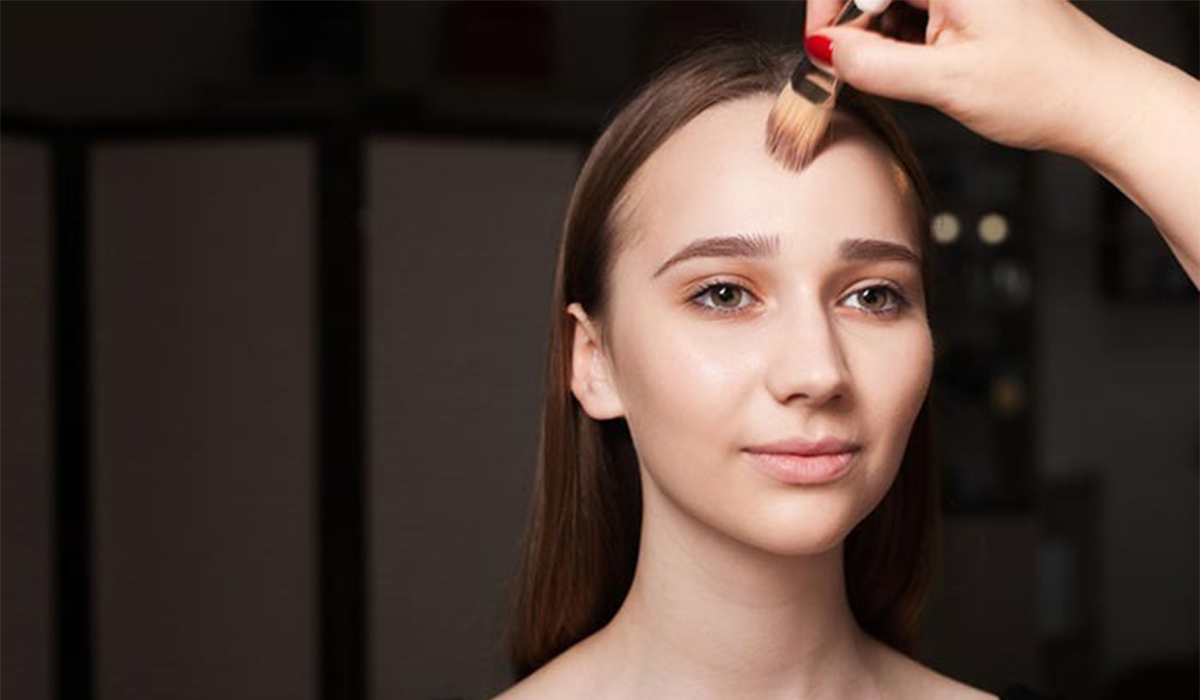
This makeup trick is great for photos. Contouring can help add dimension and shape to your face. If you want to achieve a more chiseled forehead, apply a darker foundation to the temples and hairline.


Make sure all the hair is pulled back from your face so you can easily apply and blend the makeup.

Then choose a matte concealer or foundation five shades darker than your natural skin tone.

Now start drawing a solid line on the perimeter of your forehead with a medium sized flat or dome brush.

Blending is key to any makeup look. It is a crucial and essential ingredient for a successful facial contoured look. So keep blending the product outwards until you get a seamless result.

The contour should look natural and without sharp lines.

Follow with a bronzer to make the effect appear stronger and sharper.


This trick enhances the angles of your bone structure and minimizes the round look of your face.

8 useful makeup tips to make your forehead appear smaller

3. Highlight:

Highlighting is an easy way to let the light reflect off the center of your forehead, drawing attention to the large forehead.


Choose a shimmering highlighter powder and apply it to the center of the forehead, just between your browbones and blend outwards.

You can also apply the highlighter to the bridge of your nose to accentuate the shape of your face.

With this technique, your facial features come to the fore and reduce the width of your forehead.

4. Chiseled Cheeks:

Thinner cheeks help draw attention to the center of your face, thus drawing attention away from your forehead.


Simply use a bronzer powder that is 3 to 4 shades darker than your natural skin tone.

Apply in a diagonal line from the center of your cheek towards your ear.

This make-up technique is very easy to carry out by drawing a “fish face”, perfectly positioning the hollow of your cheekbones and applying the product. And don’t forget to mix!

5. Bronzers:

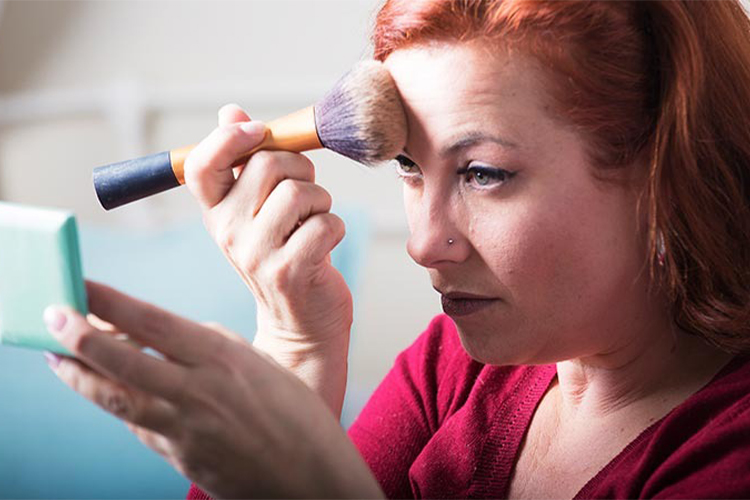
The easiest way to instantly make your forehead appear shorter is to use a bronzer. To see the effect, a bronzer needs to be in a matte formula and at least three shades darker than your natural skin tone.


Simply swipe some bronzer onto a pointed blush brush and blend the shade into your temples and crown around the hairline. This trick accentuates and creates stronger bone structure. It just makes your big forehead look smaller.

6. Dramatic Eyes:

Apply attractive eye makeup so that the focus of your face is on your eyes and draws the viewer’s attention away from your forehead. Your eye makeup can transform your face shape in an instant.

8 useful makeup tips to make your forehead appear smaller

7. Play With Your Lips:

If you want to instantly lift your face in a matter of seconds, the best way is to accentuate the lips.Apply a bright pink or coral lipstick to your lips and you’ll immediately notice how much emphasis is placed on your lips, drawing everyone’s attention away from your big forehead! All you have to keep in mind is to keep the rest of the makeup simple.

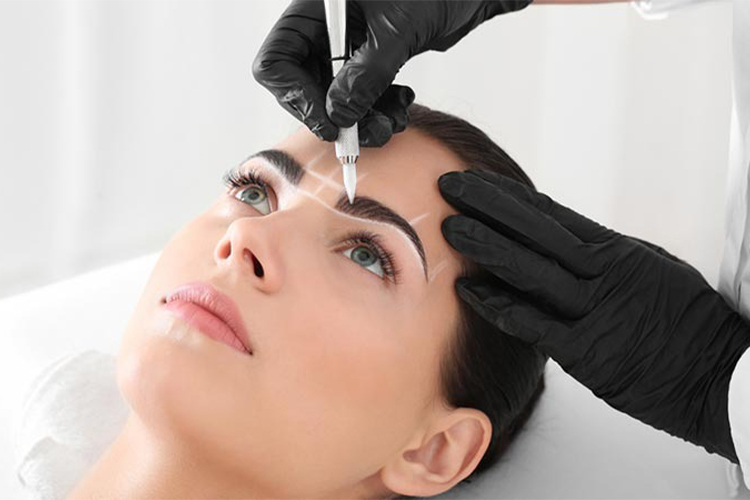
8. Choose the right eyebrow shape:

Eyebrows help make your face look thinner and younger. They help shape your facial structure. If you want to make your forehead appear shorter, change the shape of your eyebrows to an angular shape.

In summary, makeup can be a versatile and effective way to enhance our natural facial features and create the illusion of a smaller forehead. Through the strategic use of contouring, highlighting, and playing with color, we can draw attention to other parts of the face and minimize highlighting of the forehead. Remember to choose the right shades and blend well for a seamless and natural look.


Additionally, complementing these makeup tricks with appropriate hairstyles like bangs or fringes can further enhance overall appearance and confidence. Harnessing our unique qualities and experimenting with makeup can help us feel empowered and show our best selves, whether in the office or in any other setting. Have fun applying makeup and enjoy the process of creating different looks that bring out your inner beauty.

8 eye makeup tips for tight-fitting eyes

8 eye makeup tips for tight-fitting eyes

8 eye makeup tips for tight-fitting eyes

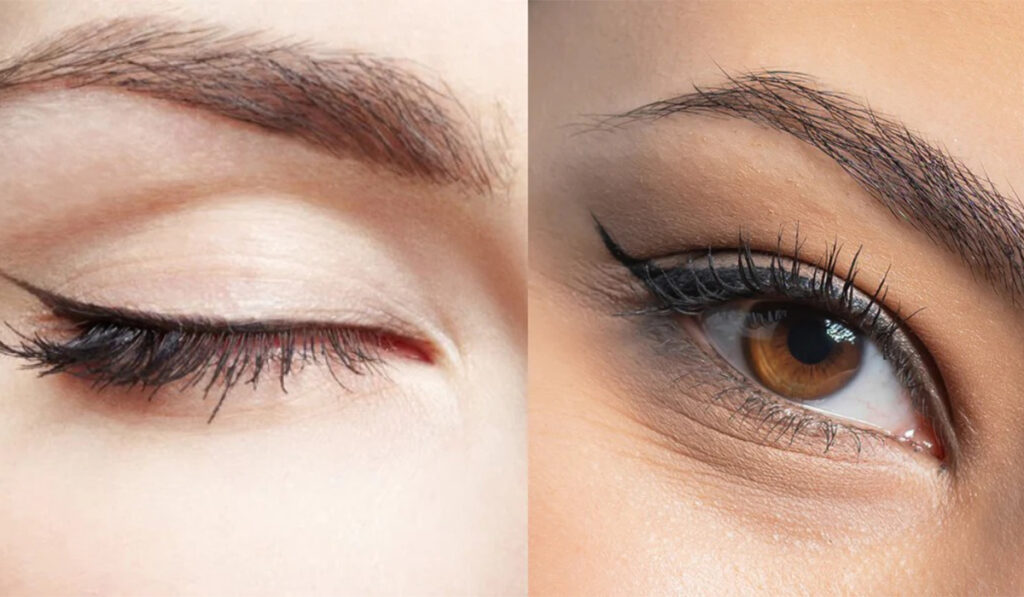
If you need eye makeup tips for narrow eyes, we’ve got you covered. Eyes come in different shapes – crested, almond, downward or upward facing and many more. Because each shape creates a different and unique face, makeup styles vary accordingly. You can determine your eye shape by measuring the distance between your eyes. If there is a lot of space, the eyes will be wide apart. If not, they are close together.


Hollywood stars like Jennifer Aniston, Sarah Paulson and many others have narrow eyes and have always emphasized them perfectly with make-up. You can achieve an eye-catching look with the tips and tricks in our post.


But remember, eye makeup can make or break your look. Therefore, follow our guide closely and be mindful when trying makeup at home. Swipe up for the details!

8 eye makeup tips for tight-fitting eyes

Important tips before you decide to do closed eye makeup

When applying cosmetics, there are several techniques that can significantly affect your overall appearance, from blending and smudging to contouring and highlighting. You can even out and brighten your facial features by creating the illusion of fuller brows that draw focus to your eye makeup, resulting in a more flattering look. However, before you dare to create your look, you should consider a few tips:


Always apply a reflective or light-colored eyeshadow to the inner corner of the eye.

Try to emphasize the natural part of your eye. Smokey eyes could be just the thing for you.

And most importantly, stay away from dark shades in the inner corners of your eyes and instead limit the smoky effect in the outer corners of your eyes.


Eye makeup for tight-fitting eyes


Below are the tips you’ve been waiting for!

8 eye makeup tips for tight-fitting eyes
  1. Prime your eyes with a primer. You can use an Urban Decay Primer Potion or a NYX Jumbo Pencil in milk.


  1. Take a highlighter shade and apply it to the inner corner of the eye to widen it. You can also use the NYX Jumbo Pen in Milk for this purpose.


  1. Use a light shimmering shade in shades of gray or beige and apply it on your eyelids. This gives your eyes a raised look. Also, make sure your eyes are free of wrinkles.


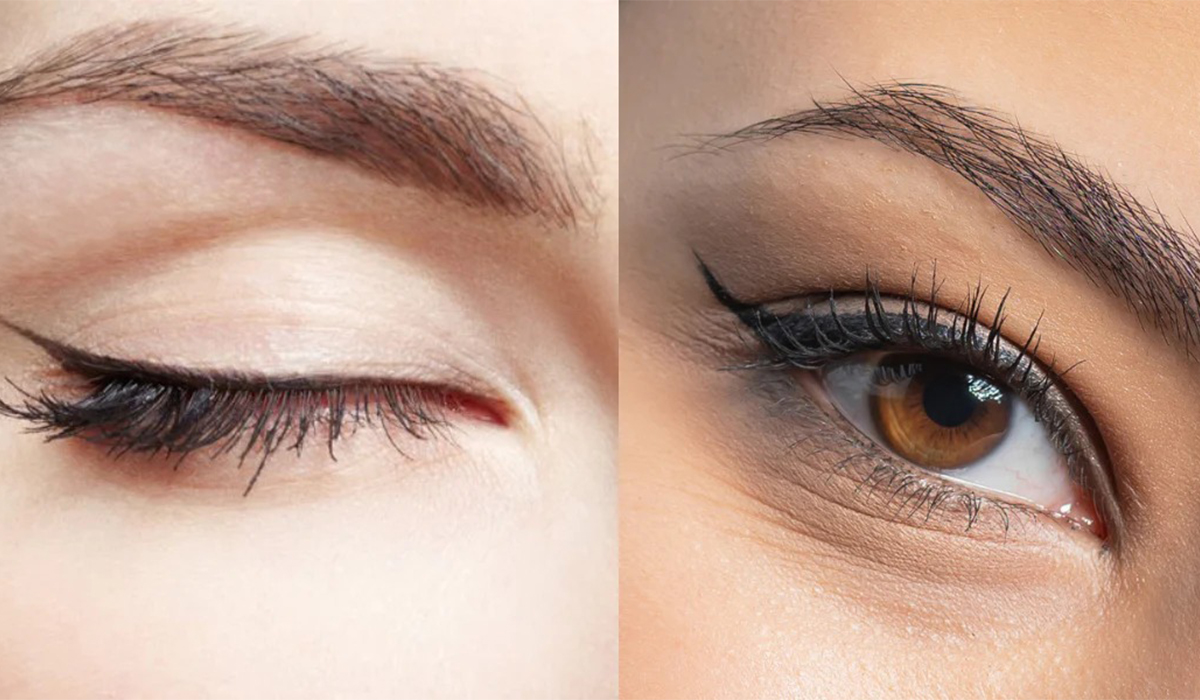
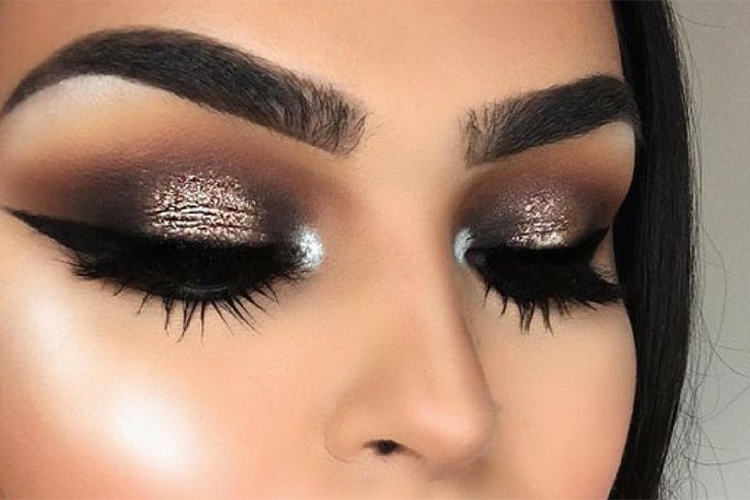
  1. A very important makeup tip for narrow eyes is to make them smoky. Yes, Smokey is the way to go here. Apply a dark eyeshadow like shades of black or brown. If you don’t want to go too dark, you can use a dark purple or blue on the outer corner of your eyes to give your eyes a wider look. Use a fluffy brush to blend any rough edges.
  1. Apply a medium-toned shadow to the lower lash line and the outer third of the lower lid.


  1. Contour your eyes. This will make your eyes appear larger.


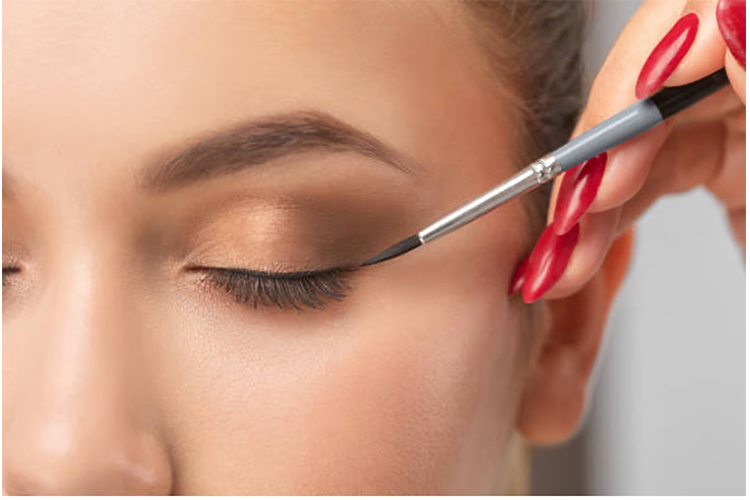
  1. Apply black eyeliner to upper and lower lash line; This will make a big difference to your eyes.


  1. Apply mascara to your upper and lower lashes. You can use Maybelline mascara as it lengthens your lashes and gives a dramatic look to the eyes.
8 eye makeup tips for tight-fitting eyes

Infographic: 6 great eye makeup tips for narrow eyes

As we are all built differently we also have different characteristics and there is beauty out there in every shape and form. That being said, it never hurts to know what makes your facial features stand out the most. If you have narrow eyes, check out the infographic below to learn how to make them appear wide with a few eye makeup hacks.

In summary, narrow or tight-fitting eyes doesn’t mean you can’t pull off a stunning and eye-catching makeup look. By following the tips and tricks provided, you can bring out your natural facial features and make your eyes appear wider and more vibrant.


Remember to use eye primer for a smooth base, apply light or reflective eyeshadow to the inner corners of your eyes, and use shimmery shades on your eyelids for a sublime effect. Take advantage of the smoky eye technique and use darker shadows to add depth and dimension. At the same time, apply medium-tone eyeshadow to the lower lash line for balance.


Contouring your eyes can make a significant difference, and using black eyeliner and mascara will further enhance your look, making your eyes appear larger and more dramatic.


Ultimately, makeup is an art form that allows you to express yourself and highlight your unique features. Enjoy your narrow eyes and experiment with different makeup styles to find what suits you best. With a little practice and creativity, you can rock any makeup look with confidence and feel great in your own skin. So, show off your stunning eye makeup and exude confidence wherever you go!

6 great makeup tips when wearing a blue dress

6 great makeup tips when wearing a blue dress

6 great makeup tips when wearing a blue dress

If you’re planning to look like a real blue princess at your prom or wedding, you’re probably googling how to do the perfect makeup with a blue dress.


Imagine a blue dress with flawless makeup. Once you start matching the colors and imagining what your eye shadow or lipstick will look like, consider yourself makeup ready. You need advice on when to go light and when to go heavy on your makeup, taking into account your complexion, the color of your eyes and the occasion. You can use different makeup techniques to make your blue outfit stand out from the crowd. Read on to learn more about them!

6 great makeup tips when wearing a blue dress

1. Play with colors

The first thing you need to know when trying out a new makeup is the color chart and color matching. Complementary colors help make each other stand out. So if you wear blue, you can also wear its counterpart on the color wheel. The reds and oranges on the color wheel complement the blues. So you can combine colors of this series like coral, orange, peach, brown with blue. Here you can play with colors and search for colors that best suit your face and complexion. Another trick is to highlight a color in different elements of your dress. For example, if your dress isn’t entirely blue but has elements of blue all over it, you can incorporate blue into your makeup as well. The presence of other colors will make your look trendy even if you emphasize the blue theme.

2nd base

The base or makeup on your bare face depends on the type of look you are going for. Start with a good exfoliation and moisturizer to maintain a fresh, dewy look throughout the day. You can combine warm colors such as deep red or orange with cooler shades of blue to create a warm look. Cool blue tones contain more green, while warm blue tones tend towards purple. For a warm look, start with a standard concealer stick and cover any blemishes, pimples and dark circles. Now choose a primer that is one shade darker than your original shade. This gives your skin a healthy, warm glow and doesn’t wash out in photos. If you’re naturally tanned, you can skip foundation and apply a tinted body butter or moisturizer instead. Seal the base with a mineral powder.

3. Cheek

Your cheeks shouldn’t be the focus of your look, but they’re just as important. You can match the cheek and lip color to take the color play to another level. Blue is generally a cool color. For a blue dress, a warm blush would work well as it will prevent fading and an unhealthy pallor. Pink blush would make your cheeks look rosy like a baby’s. If you want a warmer look, try a plum-colored blush. To work the blush, apply three small dabs of powder blush to the center of your cheeks. Apply to skin in circular motions with a large round brush. You can also try bronzer with a blue dress. Using the bronzing powder, draw two small streaks under your cheekbones. Using the brush, blend in straight strokes up and towards the ear. It imparts a pearly shine while accentuating your facial structure and giving a classy look.

6 great makeup tips when wearing a blue dress

4th eye

Your eyes should speak volumes with every alluring blue dress in your wardrobe. Remember that feminine eyes work particularly well with a bold and gender-neutral color like blue. Metallic smoky eyes with wing tips or cat eyes are some examples of classic eye makeup for a blue dress that creates a glamor. If you’re already wearing a hard blue like navy, the metallic part in your eyes could be gold or champagne. However, if you want your eye to be the focal point, try downplaying the cheeks and roots to avoid the costume look. If you wear cool blue, try adding green or blue to your eyes for a chic glamor look. Likewise, a warm blue dress requires purple or teal. Although they belong to the same family, the colors should not be exactly the same shade.


Apply light eye color to your entire eyelid. Now take a darker shadow and use an angled stiff brush to apply it to the outer corner of the eye in a V-shape to start the cat eye shape. Blend the eyeshadow towards the crease and also apply to the inner corners. The center should be the lightest shade. To spice up your look, apply warm gold glitter (if using pink or brown eyeshadow) or silver glitter (if using blue eyeshadow) to the center of the eyelids. Smear the waterlines of the upper and lower eyelids with kajal. Using colored or black eyeliner, draw a line across your upper eyelid, ending in a wing tip. Apply two coats of mascara to your lashes.


If you intend to highlight your lip and make it the focal point, avoid dramatic eye makeup. Apply a light brown or peachy eyeshadow to your eyes and finish by densely lining your lashes with kohl.

5. Lips

If you’ve created a dramatic look, a nude lip color is perfect for keeping the elegance. After scrubbing your lip, apply lip balm and line a nude lip liner. Cover your lips with a peach, pink, or other nude lipstick. If you want to make your lips the focal point of your look, opt for a red lip color. After lining, fill in the lip with the liner that will give the lipstick more durability. Now, cover your lips with a bold red lipstick to make a bold fashion statement. Warm pink or coral can also be combined well with blue.

6 great makeup tips when wearing a blue dress

6. Graduation

To complete your look, apply a squirt of makeup sealer. So your look stays fresh for a long time. If you have a mineral powder sealant, you can apply it to your face for a shimmering effect. Complete the look with the right nail polish and hair styling accessories.

Infographic: makeup tips to complement a blue dress

Color plays an important role in holding your look together, and even subtle tweaks to color can change the overall mood you’re going for. Dresses in blue can create an elegant or cheerful look. That’s why your makeup needs to be in sync to complete your look. We’ve summarized all of our tips in the infographic below!

To sum up, wearing a blue dress can make you feel like a real princess and the right makeup can enhance your overall look and create a stunning impression. By playing with colors that complement blue, choosing the appropriate base, cheek, eye and lip make-up and completing the look with a make-up sealant, you can achieve a beautiful and harmonious appearance.


Remember to consider your skin tone, eye color, and the specific shade of blue in your dress to adjust your makeup accordingly. Whether you’re going for an understated and elegant look or a bold and bold style, these makeup tips will help you find the perfect makeup to match your blue dress and make a lasting impression at any event makes an impression. Embrace your inner princess and rock this blue dress with confidence and beauty!

4 ways to get rid of blackheads in your ears and tips for prevention

4 ways to get rid of blackheads in your ears and tips for prevention

4 ways to get rid of blackheads in your ears and tips for prevention

You can develop blackheads on different parts of your face and body, including your ears. And compared to other parts of the body, getting rid of blackheads in ears can be quite a task. This is because the outer ear, where the blackheads develop, is close to the delicate inner structures of the ear and also the particular contour of the outer ear. Therefore, you must proceed with caution. Read this article to learn how to properly get rid of blackheads on your ears and tips on how to prevent them.

4 ways to get rid of blackheads in your ears and tips for prevention

What are blackheads?

Blackheads are tiny black bumps that form on your skin when dead cells and dirt clog pores and block sebum production. These deposits in the oil glands lead to bumps on the skin (1). The clogged material oxidizes when exposed to air (since the top of the pores are open) and turns black.


Blackheads can form anywhere on the body, especially if you have oily skin. However, they are commonly seen on the chin, nose, and forehead. But your ears are no exception.


Why do blackheads form in the ear? Let’s hear it from an expert. Keep scrolling!

What Causes Blackheads in Your Ears?

dr Robin Evans, a board-certified dermatologist, says that ear blackheads are common in people with acne-prone skin. “It’s particularly common in people who have blackheads elsewhere on their face,” she says.


The skin inside your ear has hundreds of microscopic hair follicles and glands that produce oil and earwax. These substances make the skin more susceptible to blackheads. Genetic factors, different immune responses, hormonal fluctuations, and stress could also be factors that can lead to clogged pores, although more research is needed to prove this.


Most of you may know how to remove blackheads from face. But what about your ears? Scroll down to find out.

How to remove blackheads from ears?

There are some simple things you can do to get rid of blackheads in your ears.

1. Wash your ears regularly

Wash your ears daily to remove dirt, excess oil, and other debris.

You can use a cleanser that contains salicylic acid — an effective and safe solution for acne lesions (2).


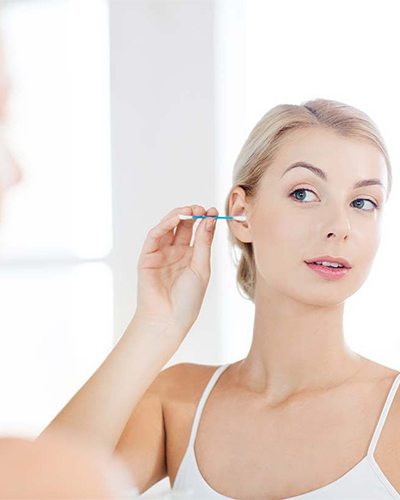
Rub your ears with a cotton ball soaked in the detergent.

Wipe it off with a clean cotton ball and rinse your ears.

Tilt your head to the side to prevent the cleaner from dripping into your inner ear.

Related: Using Hydrogen Peroxide to Remove Earwax: Safe or Not?

2. Exfoliate your ears

Exfoliating will help you remove dead skin cells that are clogging your pores. Exfoliants that contain salicylic acid, glycolic acid, or alpha hydroxy acids are effective in treating acne problems (3), (4).


Take some scrub on your finger and gently rub it on the blackheads in your ear. Leave it on for 2-3 minutes.

Wipe it off with a clean cotton ball or soft cloth.

Exfoliate your ears once a week.

Note: Improper and excessive ear peeling can cause redness and itching. Be sure to adjust the concentration of these scrubs to your skin type to avoid any unwanted effects.

4 ways to get rid of blackheads in your ears and tips for prevention

3. Use acne medication

Use acne medications or topical antibiotics like retinoids and adapalene for recurring blackheads (5).


You can also use over-the-counter medications to get rid of blackheads in your ears overnight. Medications that contain ingredients like salicylic acid, glycolic acid, or alpha hydroxy acids can help unclog pores and remove blackheads. If you have any skin conditions, consult your doctor before taking over-the-counter acne medication.


Although manual extraction methods also exist, it is best to consult a professional for this.


dr Robin Evans says, “The topical medications target the keratin formation that causes blackheads.” They come in a 0.3 percent formulation (gel) as prescription drugs and in a 0.1 percent formulation (cream) as over-the-counter products available. “Although the stronger agent is more effective, one could try the over-the-counter product to begin treatment,” she adds.

4. Extract the blackheads

Consider removing the blackheads with an extraction tool if these methods don’t work. This tool will help you release the oil in the affected pores.


Manual extractions can be the best choice when you want to know how to remove blackheads from ears. The extractions are quite difficult to perform on yourself. Therefore recommends Dr. Evans to have this procedure performed by an experienced doctor. A professional knows how much pressure to apply to the skin, at what angle, and what safety precautions to take.


Even after removal, blackheads can appear. So you should know how to prevent them. Keep scrolling for a list of tips to follow.

This will prevent blackheads from forming in your ears

It’s important to keep your ears clean and free of excess oil to prevent blackheads from forming. Here are some tips you can follow:


Clean your ears daily with a cotton ball or soft cloth.

Avoid touching your ears frequently as this can trigger an outbreak.

Clean everything that comes in contact with your ears weekly, including your cell phone and pillowcases. This helps prevent dirt and bacteria from building up in your ears.

Only use non-comedogenic skin care products.

Tie back your unwashed hair to prevent the oil from getting into your ears.

Do not remove blackheads with your nails or needles as this can cause irritation and further pimples. Infection and inflammation can also occur, leading to painful and swollen pimples.

Don’t apply acne products more often than recommended. This can dry out your skin and lead to excessive oil production, leading to more blackheads.

Wondering when to consult a dermatologist? Find out in the next section.

4 ways to get rid of blackheads in your ears and tips for prevention

When should you see a dermatologist?

Visit a dermatologist if none of the above methods work for you. As previously mentioned, it is always a good idea to see a dermatologist to remove blackheads with an extractor.


In addition, the independent removal of blackheads from the ear can be painful. The ear cartilage is sensitive. A dermatologist will loosen the blackheads with a sharp scalpel blade and remove them with a cotton swab. They can also prescribe medication for blackhead removal and prevention.

Infographic: Can Headphones Cause Blackheads?

A lack of simple headphone hygiene is why your headphones can cause blackheads in your ears. Headphone hygiene means regular cleaning of your headphones. However, other headphone-related issues can also play a role. Learn how to prevent blackheads in your ears caused by your headphones in the infographic below.

In summary, blackheads can develop in the ears due to clogged pores, excess oil, and dead skin cells. While there are several ways to remove blackheads from ears, it’s important to exercise caution and follow the right techniques to avoid damaging the delicate ear skin and structures. Regular ear cleaning, exfoliation, and the use of acne medication or topical antibiotics can help clear blackheads. When these methods fail, consulting a dermatologist for professional extraction and prescribing medication is advisable.


To prevent ear blackheads, it is important to practice good ear hygiene, avoid frequent touching, and regularly clean objects that come in contact with the ears. Additionally, using non-comedogenic skin care products and not using nails or needles to remove blackheads is vital to preventing irritation and further breakouts.


Overall, proper care and attention can help treat and prevent blackheads in the ears and keep ear skin healthy and clear without causing damage or discomfort.

5 DIY agave nectar face masks for flawless skin

5 DIY agave nectar face masks for flawless skin

5 DIY agave nectar face masks for flawless skin

Agave nectar is an ancient remedy extracted from the leaves of the agave (a succulent plant) that helps treat various skin conditions. Topical application of this natural sweetener has a skin-soothing effect and may aid in wound healing. The agave nectar face mask purifies the skin and provides a refreshing feeling. This article is about the benefits of agave nectar for the health and well-being of your skin, as well as some DIY agave nectar face mask recipes you can make at home. Continue reading.

5 DIY agave nectar face masks for flawless skin

Agave Nectar: What Is It and How Is It Beneficial for Your Skin?

Agave nectar (pronounced uh-ga-vee) is derived from the agave plant (the same plant used to make tequila). This succulent’s razor-sharp, spiky looks are quite intimidating, but beneath its sturdy exterior lies the solution to all your skin problems—agave nectar.


Agave nectar looks similar to honey. It is commonly used to sweeten beverages. However, just like honey, it also has healing properties. The ancient Aztecs considered this plant a gift from the gods. They used the nectar to flavor their food and drinks. It was also part of their folk remedy.


So how exactly does it help care for your skin? Here’s how:


Its moisturizing properties keep your skin hydrated, soft and supple.

It plumps your skin and reduces the appearance of fine lines.

It soothes irritated skin.

It brightens your skin.

When mixed with other ingredients, it gently exfoliates your skin.

If you have dull and dry skin, agave nectar can bring it back to life.

If you are struggling with a combination of different skin problems, agave nectar is an absolute godsend for you. Here are a few rejuvenating DIY agave nectar face mask recipes you can try to reap the benefits of this wonder ingredient.

DIY agave nectar face masks

1. Agave Nectar and Turmeric Face Mask (To Brighten Your Skin)

you will need

1 tablespoon agave nectar

1 teaspoon turmeric powder

method

Mix the ingredients in a glass bowl.

Apply the mixture to the entire face with a cosmetic brush.

You can also apply it to your lips as a lip mask.

Leave it on for 20-60 minutes.

Dampen a washcloth with lukewarm water and gently wipe the mask off your face.

Wash your face with a mild face wash and pat dry.

If you have dry skin, apply a skin serum or light moisturizer.


Note: This agave nectar mask may drip and stain your clothes. Be sure to cover your clothes and clean your face thoroughly before starting any skin care routine.

5 DIY agave nectar face masks for flawless skin

2. Face mask and scrub with agave nectar and coffee (for dull and dry skin)

you will need

1 tablespoon agave nectar

1 tablespoon of coffee grounds

method

Place agave nectar and coffee in a glass bowl.

Use a spatula to mix them together.

Use your fingers to spread the mixture all over your face, except for the delicate areas around your eyes.

Leave on for 15 minutes.

Gently massage in the scrub with your fingers in circular motions. Continue doing this for another 5-10 minutes.

Wash your face first with lukewarm water, then with cold water.

Pat your face dry and apply aloe vera gel or a light serum.

3. Face mask with agave nectar and baking soda (to rejuvenate your skin)

you will need

1 teaspoon agave nectar

½ teaspoon baking powder

2 drops essential oil (lavender oil or tea tree oil)

method

Mix agave nectar and baking soda in a glass bowl.

Add the essential oil and mix.

Wash your face thoroughly before applying the mask.

Apply the mask to your skin with your fingertips.

Leave it on for at least 10 minutes or until it dries.

Once the mask is completely dry, dampen a washcloth and gently wipe the mask off your face.

Wash your face with a mild cleanser and pat dry.

Apply a light serum or moisturizer (optional).

4. Agave Nectar and Oatmeal Face Pack (to moisturize your skin)

you will need

1 tablespoon agave nectar

1 tablespoon ground oatmeal

method

Mix both ingredients in a glass bowl.

Apply the mask generously to your face with your fingers. Distribute evenly on neck and face.

Leave on for 30 minutes.

Dampen the face mask with a little water and gently scrub in circular motions before rinsing off.

Clean your face with a gentle face wash.

Note: You can prepare this face mask and store it in a glass jar for multiple face mask sessions. However, do not keep it for more than a week.
5 DIY agave nectar face masks for flawless skin

5. Agave nectar, avocado and aloe vera face mask (for smooth and glowing skin)

you will need

2 tablespoons agave nectar

¼ cup aloe vera gel

½ avocado (mashed)

1 teaspoon sweet almond or jojoba oil

method

Mix all the ingredients in a bowl until you get a smooth paste.

Apply the mask to the entire face, including the under-eye area, using a cosmetic brush.

Let your skin immerse yourself in the beneficial effects of the mask for 30 minutes.

Wash your face with cold water.

Then apply a moisturizing cream or moisturizing gel.

Infographic: 3 agave nectar face masks for beautiful skin

Agave nectar has been used since ancient times for its many skin-beneficial properties. If you’ve always wanted to incorporate this natural elixir into your beauty routine but aren’t sure how, you’ve come to the right place. Check out the infographic below for 3 DIY Agave Nectar Face Masks and say hello to clear, glowing skin!

In summary, agave nectar, extracted from the agave plant, offers numerous skin benefits. Its moisturizing and healing properties make it an excellent ingredient for DIY face masks that can treat various skin problems. From brightening and exfoliating to rejuvenating and moisturizing, agave nectar can contribute to flawless and radiant skin.


The DIY agave nectar face mask recipes presented in this article are easy to prepare at home and can be adapted to different skin types and problems. However, it is important to do a patch test before applying any new product to the face, especially for those with sensitive skin or allergies.


By incorporating agave nectar into your skincare routine, you can savor the ancient wisdom of this natural elixir and experience its transformative effects on the health and appearance of your skin. Try these DIY face masks and harness the power of agave nectar for a radiant and revitalized complexion.

Top 15 Tips To Take Care Of Dry Skin (DIY Methods)

Top 15 Tips To Take Care Of Dry Skin (DIY Methods)

Top 15 Tips To Take Care Of Dry Skin (DIY Methods)

Dried, scratchy and dull looking cracked skin needs special attention and care. Whether it’s winter or summer, whether it’s humid or dry, moisturizing alone may not be enough to maintain skin hydration. But don’t panic; We have put together some tips for dry skin here. In addition, a few simple techniques to increase your skin’s moisture-binding ability will help you achieve softer, more supple, and more radiant skin. Read on to learn about the 15 best techniques and home remedies to treat dry skin. Keep scrolling.

1. Use warm water

When showering or washing our face, we rarely pay attention to the water temperature. However, water temperature plays an important role in keeping your skin hydrated. Use lukewarm water instead of hot water for bathing and washing your face. Lukewarm water prevents your skin from drying out further.

Top 15 Tips To Take Care Of Dry Skin (DIY Methods)

2. Use a fragrance-free detergent

Scented cleaning products contain harsh chemicals that can cause skin irritation. Use a gentle, fragrance-free cleanser on your body and face. Such a product preserves the natural moisture of the skin.

3. Use coconut oil

Coconut oil is high in fatty acids (1). It helps to moisturize the skin and lock in moisture in the skin. It also softens and smoothes the skin. Apply coconut oil right after you shower or before bed.

4. Use an oatmeal moisturizer

If you have dry, itchy, and sensitive skin, switch to an oatmeal moisturizer. Oatmeal moisturizers help calm and soothe irritated and inflamed skin (2). They also help protect the skin from UV rays and reduce redness.

5. Use aloe vera gel

Aloe Vera has anti-inflammatory properties and helps moisturize the skin. Applying aloe vera gel to your face after toning will help soothe and nourish your dehydrated skin and dead skin. Massage the aloe vera gel in circular motions for 5 minutes. Wait 10 minutes before applying any moisturizer. Gloves and socks enriched with aloe vera also help improve skin integrity and reduce dryness (3), (4), (5).

6. Apply the avocado mask

Avocados are high in vitamin E, a powerful antioxidant and skin moisturizer (6), (7). Also, using an avocado face pack can improve skin health and reduce dryness. Mash half an avocado, add 1 tablespoon olive oil and 1 tablespoon milk. Mix well and apply the mask to face and neck. Wait 20 minutes before washing it off with lukewarm water. Do this two to three times a week.

Top 15 Tips To Take Care Of Dry Skin (DIY Methods)

7. Apply hyaluronic acid serum

You can also keep your skin hydrated, plump and glowing with a hyaluronic acid serum. Dry skin tends to look aged faster, especially because the sebum glands don’t produce enough oils to keep your skin wrinkle-free and plump. Hyaluronic acid is known for its ability to retain water (8). You can use it (with or without glycerin) during the day before applying moisturizer, sunscreen and makeup.


Hyaluronic acid serums can work wonders for dry skin. A recent study published in the Journal of Cosmetic Dermatology showed an increase in overall skin hydration after using hyaluronic acid formulations for both short- and long-term use. Here’s a glimpse of how the formulation effectively increased water levels in facial skin tissue.


Hyaluronic acid increases skin moisture

clean skin

post application

baseline

week 2

week 4

week 8

72

74

76

78

80

82

84

86

Effect of the formulation over 8 weeks

Percentage of skin moisture

Effectiveness of the formulation over 8 weeks: Clean skin after use

Baseline 72.053 76.505

Week 2 73,063 75,874

Week 4 78,874 84,021

Week 8 81,526 85,537

Source: Multicenter evaluation of a topical hyaluronic acid serum

8. Avoid using anti-aging products

Anti-aging products are an absolute taboo for dry skin. However, if you use any, make sure they are free of retinoids or AHAs, as these can irritate dry skin (9), (10).

9. Regular exfoliation

Dry and peeling skin can feel itchy as well as irritating. An easy way to get rid of flaky skin is to exfoliate. Use a gentle exfoliant or chemical peels like mandelic acid to remove the top layers of dead and dry skin and cracked skin. Here are some good dry skin exfoliants to try.

10. Add oils to your bath

Do you like to soak your tired body in a lukewarm water bath with bath salts? Then consider adding your favorite body oil to your bath next time. This way your skin stays moisturized and nourished. Also, you can remove dead skin and rough skin much more easily.

11. Protect your skin from the sun

Exposing dry skin to the sun can make the problem worse. The sun’s harmful UV rays accelerate skin aging and lead to the premature appearance of wrinkles and fine lines (11). To protect your skin, apply an SPF 50 sunscreen to your exposed skin before heading out. Wear a scarf, wide-brimmed hat, hat, and sunglasses to protect your face.

Top 15 Tips To Take Care Of Dry Skin (DIY Methods)

12. Apply lip balm

Dry skin isn’t just limited to the cheeks, nose or forehead. Your lips can also become dry and cracked. Take care of your lips by applying a moisturizing lip balm or lip oil. You can also apply a mixture of honey and coconut oil daily as a lip mask to treat dry lips.

13. Use oil-based makeup

Water-based makeup is not suitable for dry skin. It may contain ingredients like dimethicone that could further dry out your skin. Use makeup from foundations and eyeshadows, as well as cream or oil-based blushes and lipsticks. Dry skin can always use the extra moisture these makeup products contain. The right make-up products also prevent dry patches or dandruff. Such products give your skin a healthy glow and a dewy finish.

14. Stay hydrated

You need to stay hydrated, especially if you have dry skin. Drink 8 glasses of water a day (or more if you exercise or live in hot climates). Consume watermelons, oranges, cantaloupes, celery, cucumbers and tomatoes to provide your body with the right nutrients and antioxidants that protect and nourish your skin.

15. Take omega-3 fatty acids and vitamin E

Omega-3 fatty acids and vitamin E supplements are rich in anti-inflammatory and antioxidant properties (7), (12). These supplements can help reduce skin inflammation and oxidative stress in the body, thereby reducing skin dryness as well (13), (14). Talk to your doctor to determine dosage and frequency.

In summary, dry skin needs special care and attention to keep it hydrated and healthy. By following these top 15 tips and DIY methods, you can effectively combat dryness, relieve irritation, and achieve softer, more radiant skin. Remember to use gentle, nourishing products, avoid harsh chemicals, and protect your skin from environmental elements like the sun. Additionally, maintaining proper hydration and incorporating beneficial dietary supplements can further improve your skin’s moisture levels. With consistent care and the right approach, you can look forward to healthy, hydrated and glowing skin all year round.